Retool and Mailtrap Integration
Send Emails with Retool and Mailtrap
Step-by-step guide on how to integrate Mailtrap with your Retool application.
Mailtrap is an email-sending solution for developer and product teams. Focused on fast delivery and high inboxing rates for transactional and promo emails. Provides highly customizable API and 24/7 tech support.
Prerequisites:
- A Retool account and a project.
- A Mailtrap account for sending emails.
Step 1. Create a REST API resource (Mailtrap)
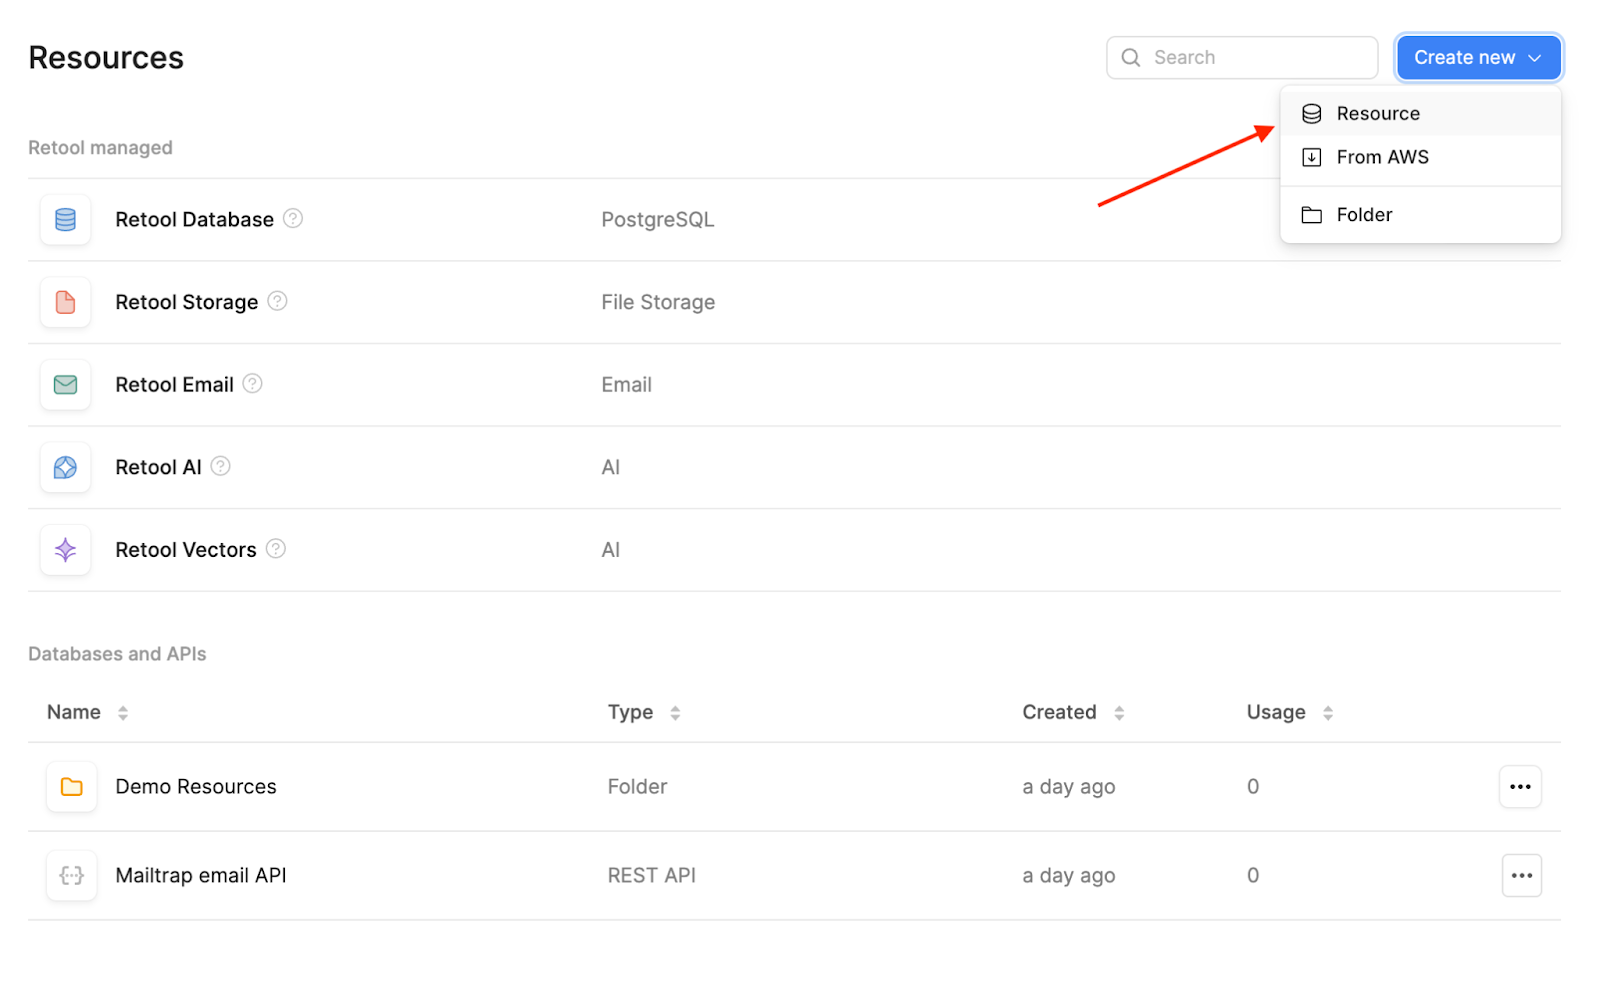
Open Retool and go to the Resources tab. Once there, click on Create new → Resource.
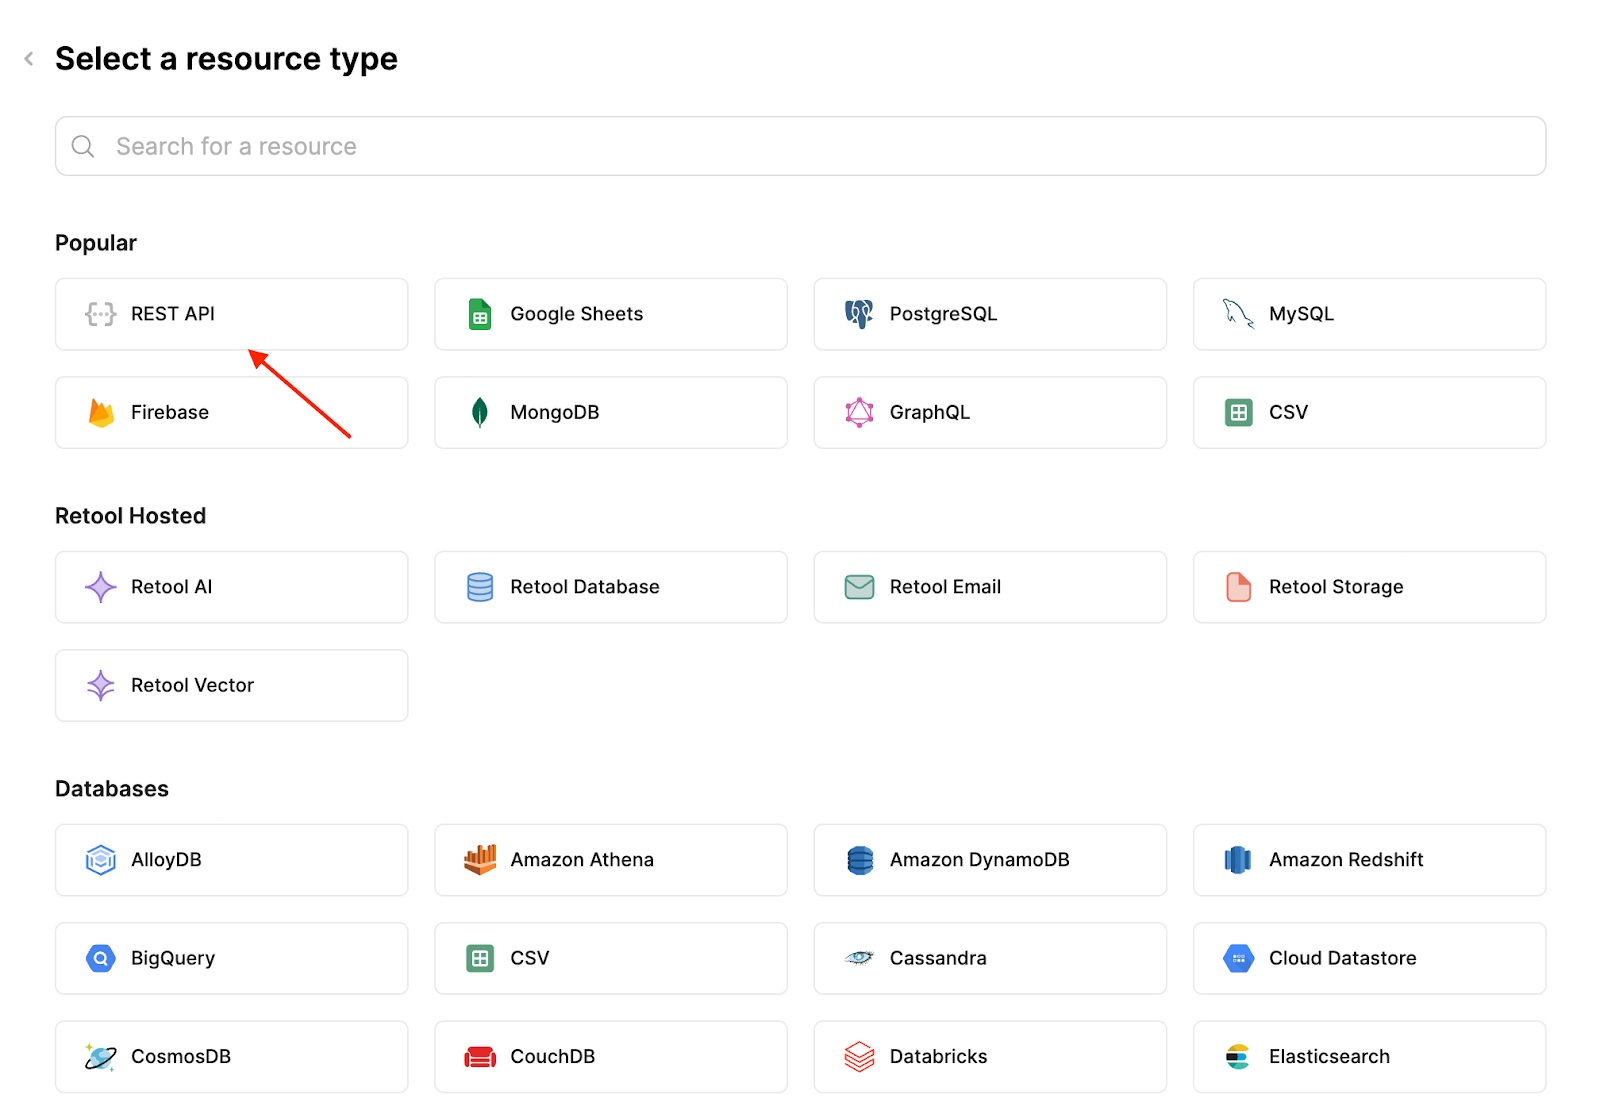
On the next page, select REST API.
Then, all you need to do is:
- Enter your desired resource name
- Add the Mailtrap root ULR, which is https://send.api.mailtrap.io/
- Note: This URL lets you use other endpoints later on if you wish depending on your use case (i.e., create contacts). Additionally, if you plan on sending mass emails, the root URL should be https://bulk.api.mailtrap.io/
- Choose Bearer for authentication and add your Mailtrap API key
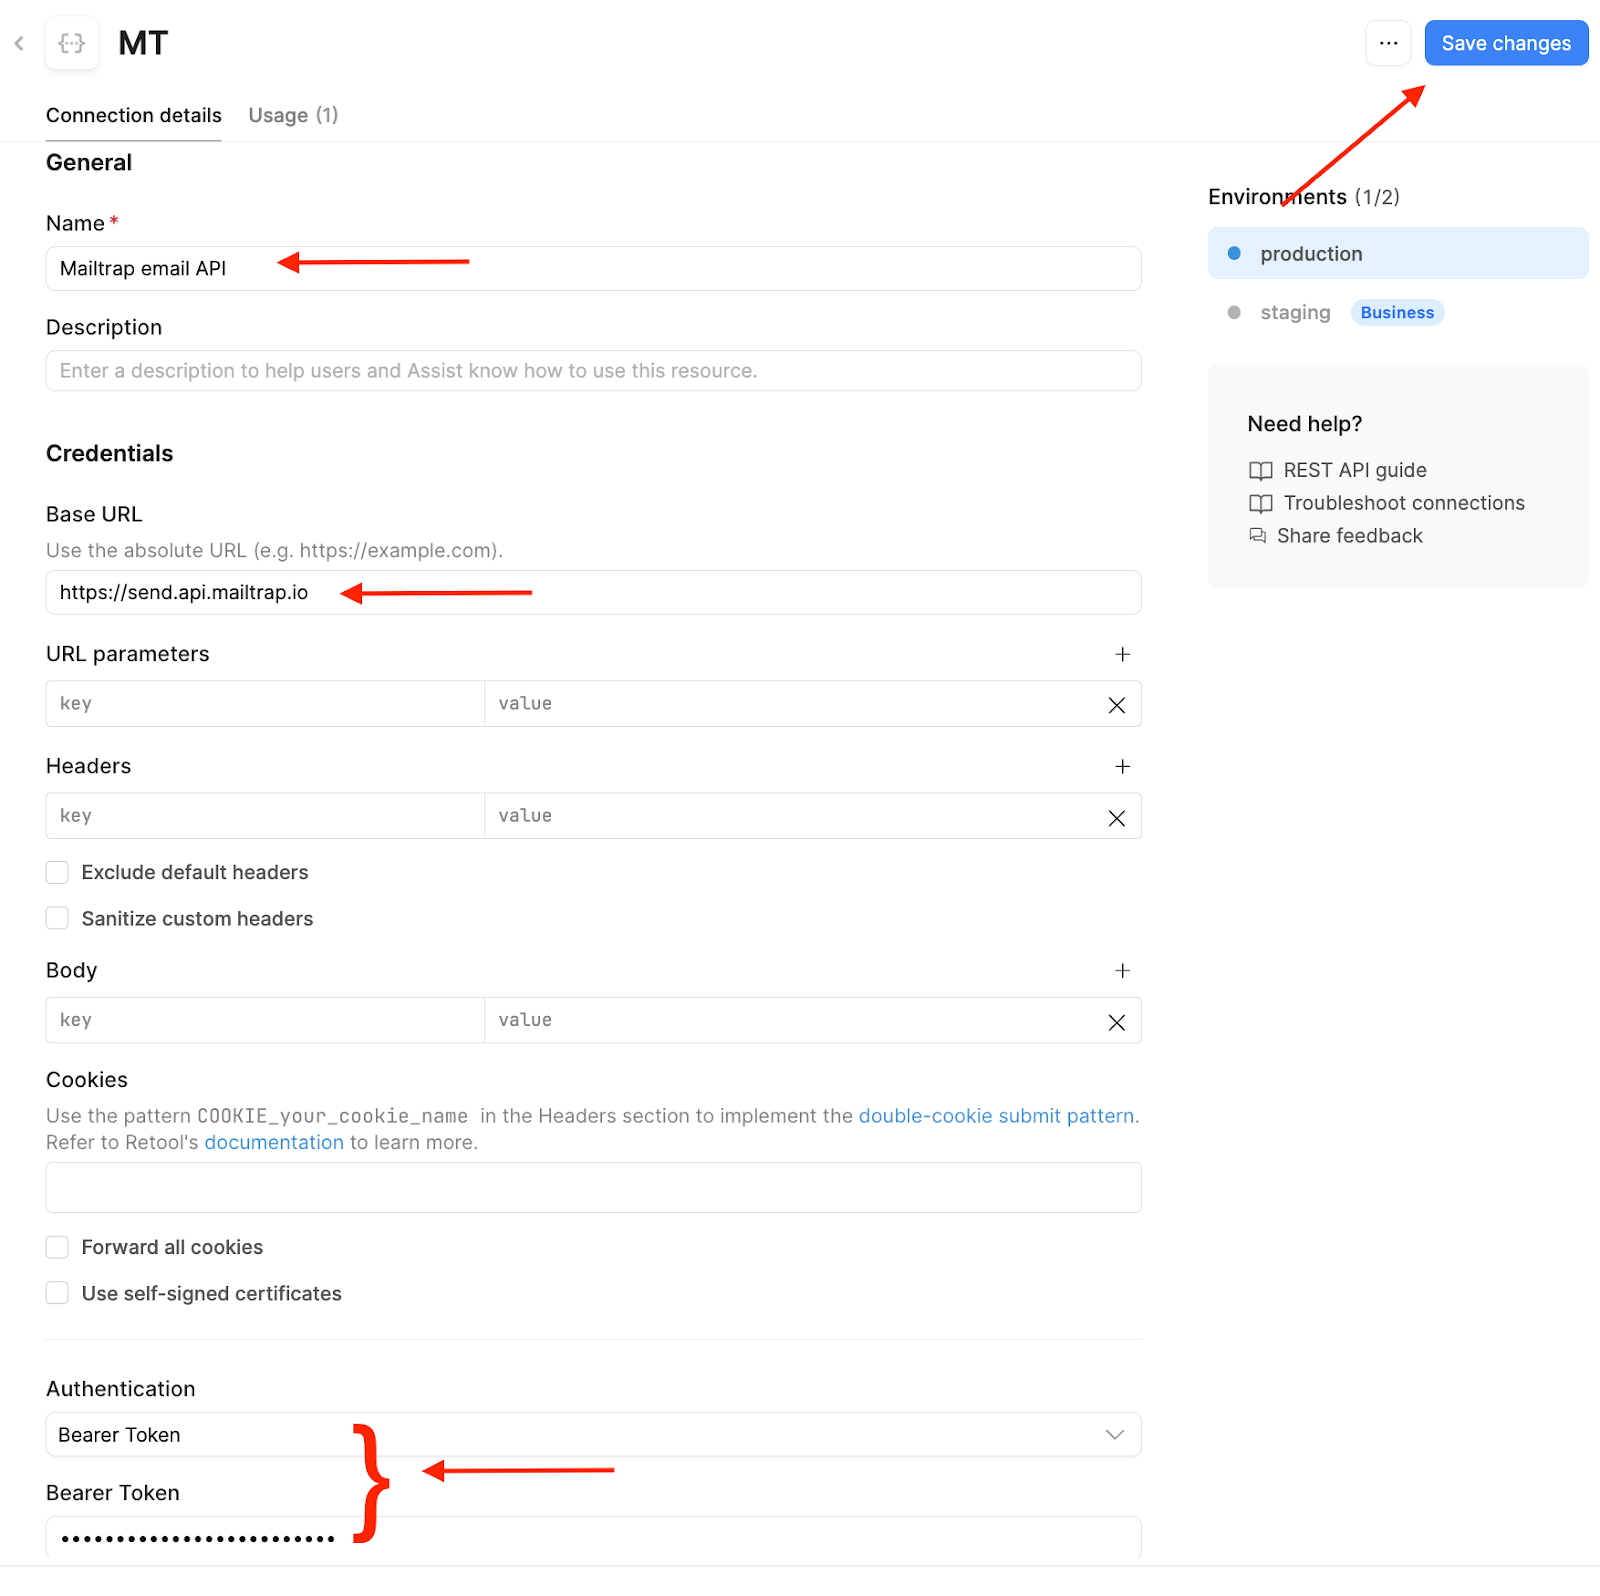
Once you insert the required details, make sure to click Save changes and go back to your project.
Step 2. Configure a query
As the next step, we'll add a query to the Query Library. Queries stored here can be reused across any of your Retool apps.
In this example, we’ll create a query that sends an email with fixed content defined in the query settings. However, you can use any Mailtrap endpoint with Retool such as managing contacts, updating email templates, or sending messages to a sandbox. For more information, please check out the official Mailtrap email API documentation.
As for the Query, create a new one and:
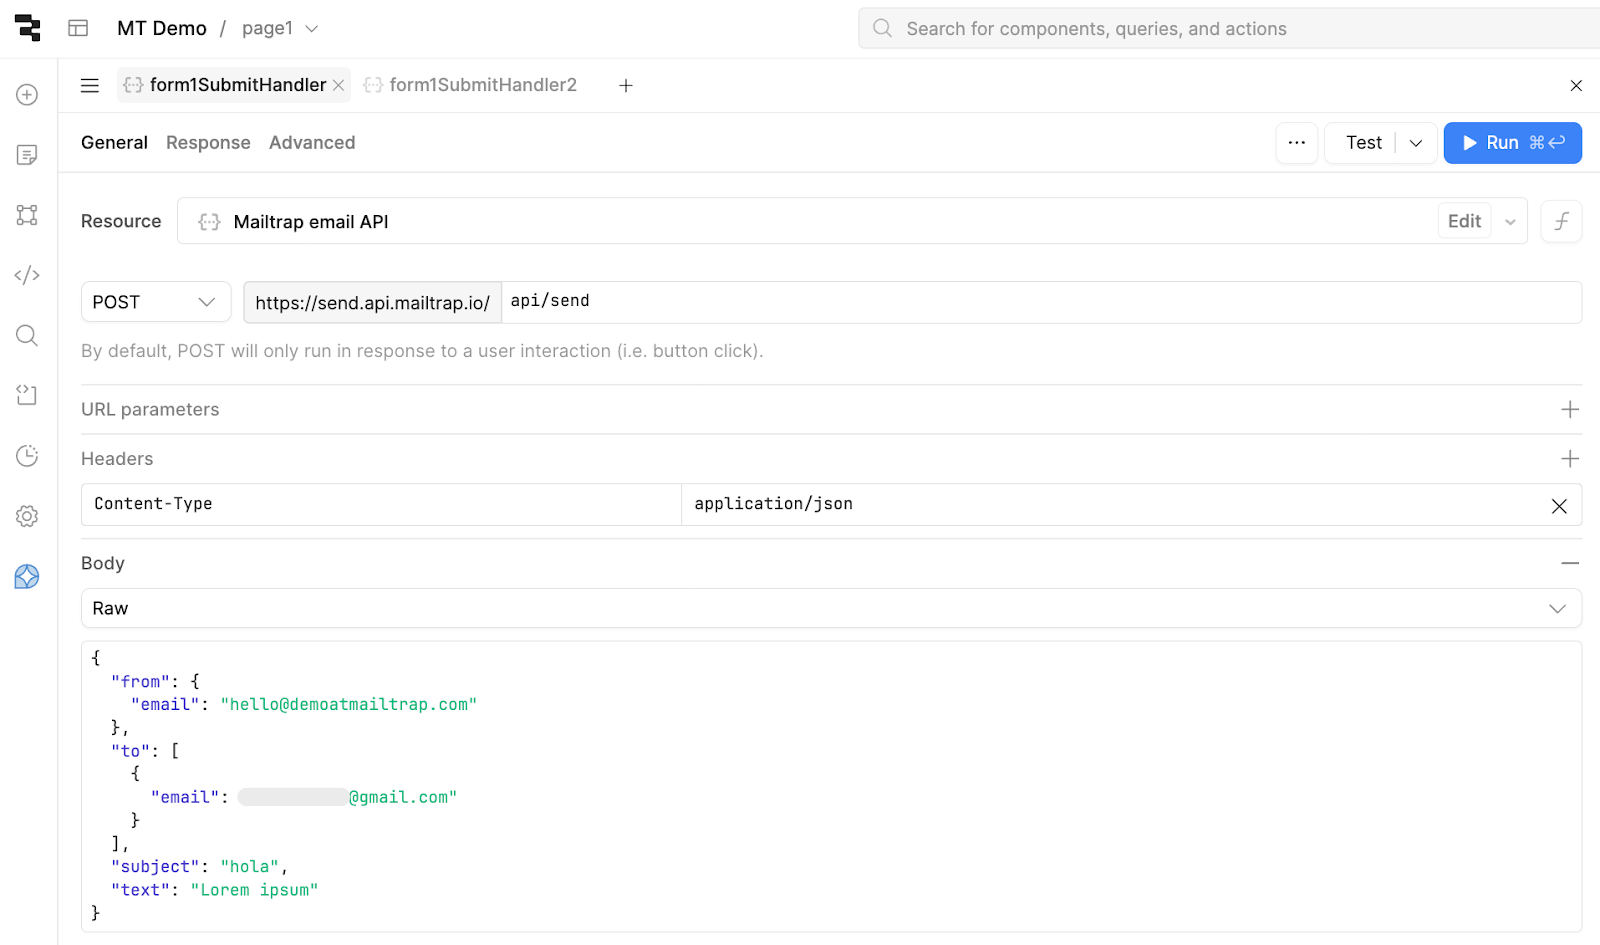
- Select the resource you created that connects the Mailtrap email API
- Choose POST and add the API endpoint. In this case, it’s api/send
- Add a Content-Type header with application/json as value
- Choose RAW as the Body type and use the following code snippet for testing purposes:
{
  "from": {
    "email": "hello@demoatmailtrap.com"
  },
  "to": [
    {
      "email": "djuric.eth@gmail.com"
    }
  ],
  "subject": "hola",
  "text": "Lorem ipsum"
}
Important: This is just an example body for sending emails from a simple form. Feel free to adjust it according to your needs. Additionally, make sure to add your ‘from’ address with a verified sending domain.
Here’s what your new query should look like:
Step 3. Test the integration
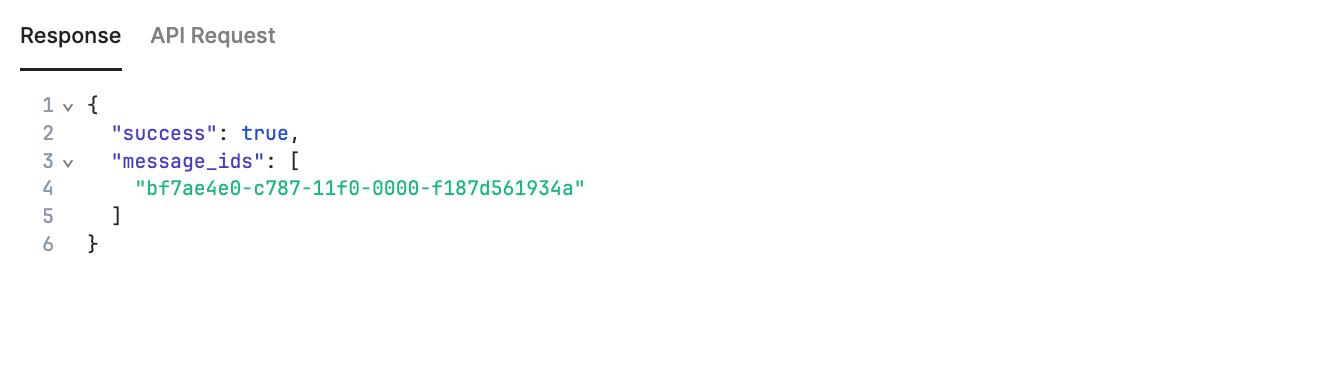
Finally, to test your configuration, click on the Test button in the upper-right corner of the Query editor, and you should see the following response:
Here it is in the Gmail inbox:

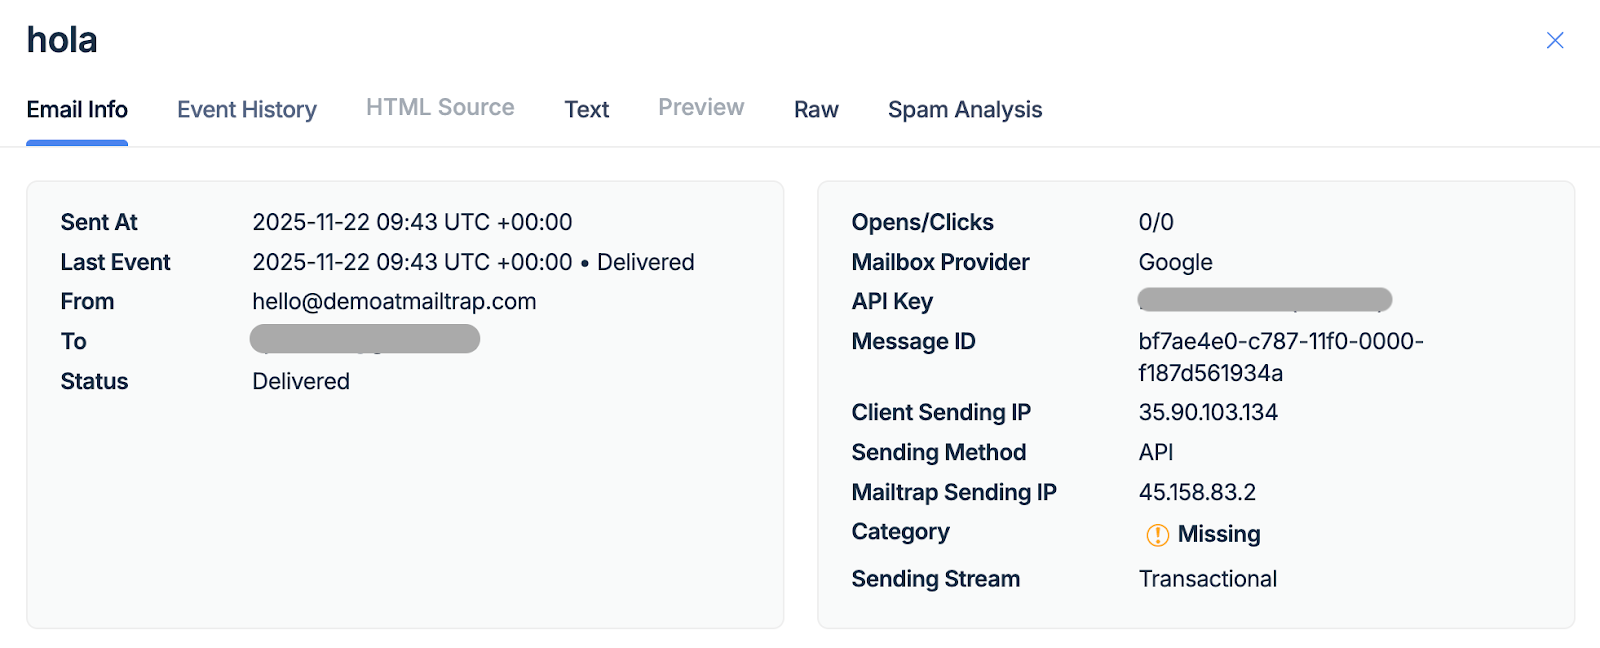
And here it is in the Email Logs tab in the Mailtrap dashboard.
Before you go: If you plan on collecting email addresses for a list, you can connect your Retool project with Mailtrap Contacts and store your addresses in the Mailtrap dashboard automatically. For reference, check out the official Mailtrap Contacts API documentation.