How to add DNS records to popular hosting providers
In This Article:
To add and verify a sending domain in Mailtrap, you need access to your domain’s DNS records and your hosting provider account.
Read this article for more details on setting up your sending domain. Continue reading to learn how to add Mailtrap DNS records to popular hosting providers.
GoDaddy
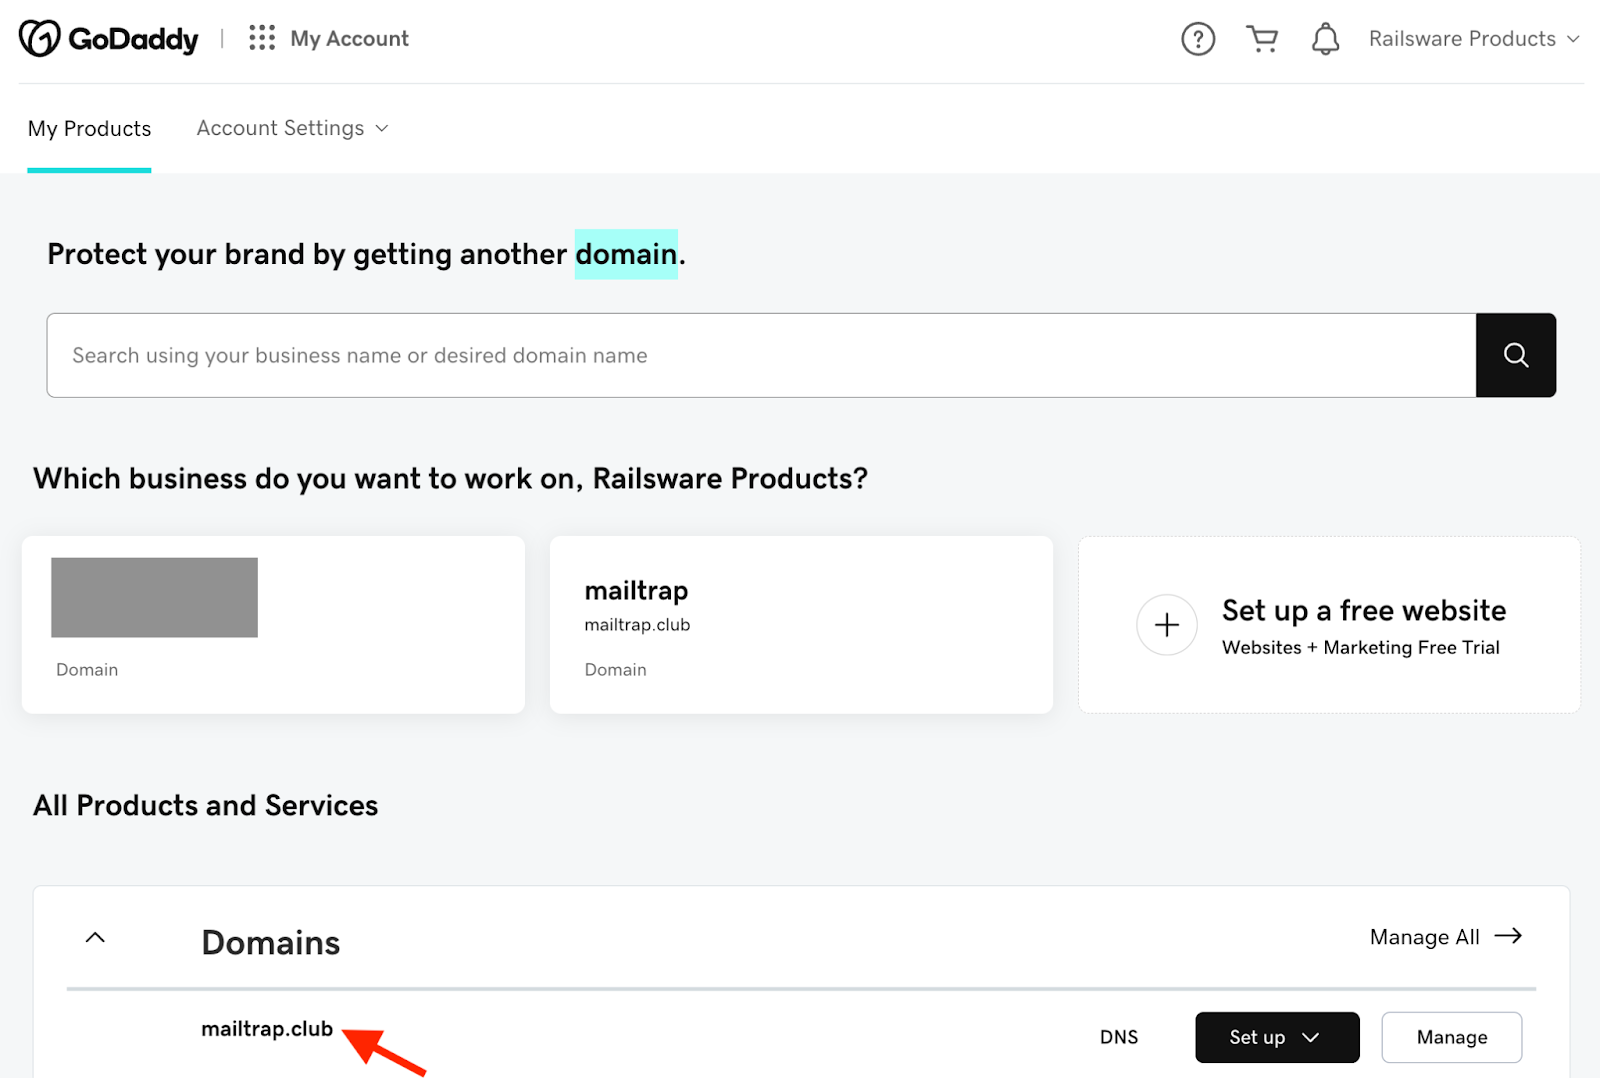
- Go to GoDaddy and locate the domain you’ve added to Mailtrap.
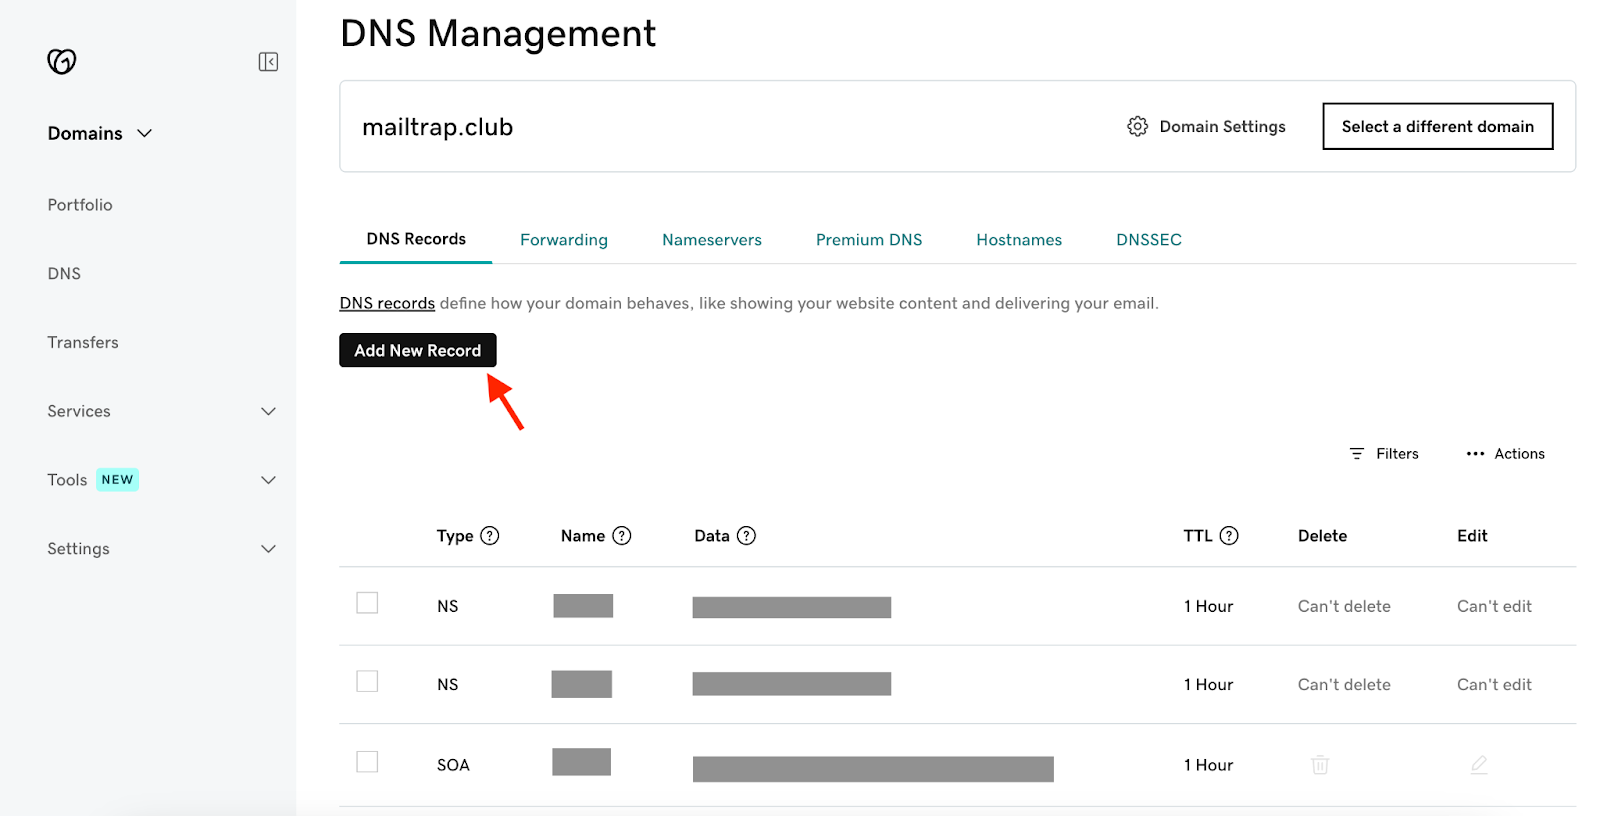
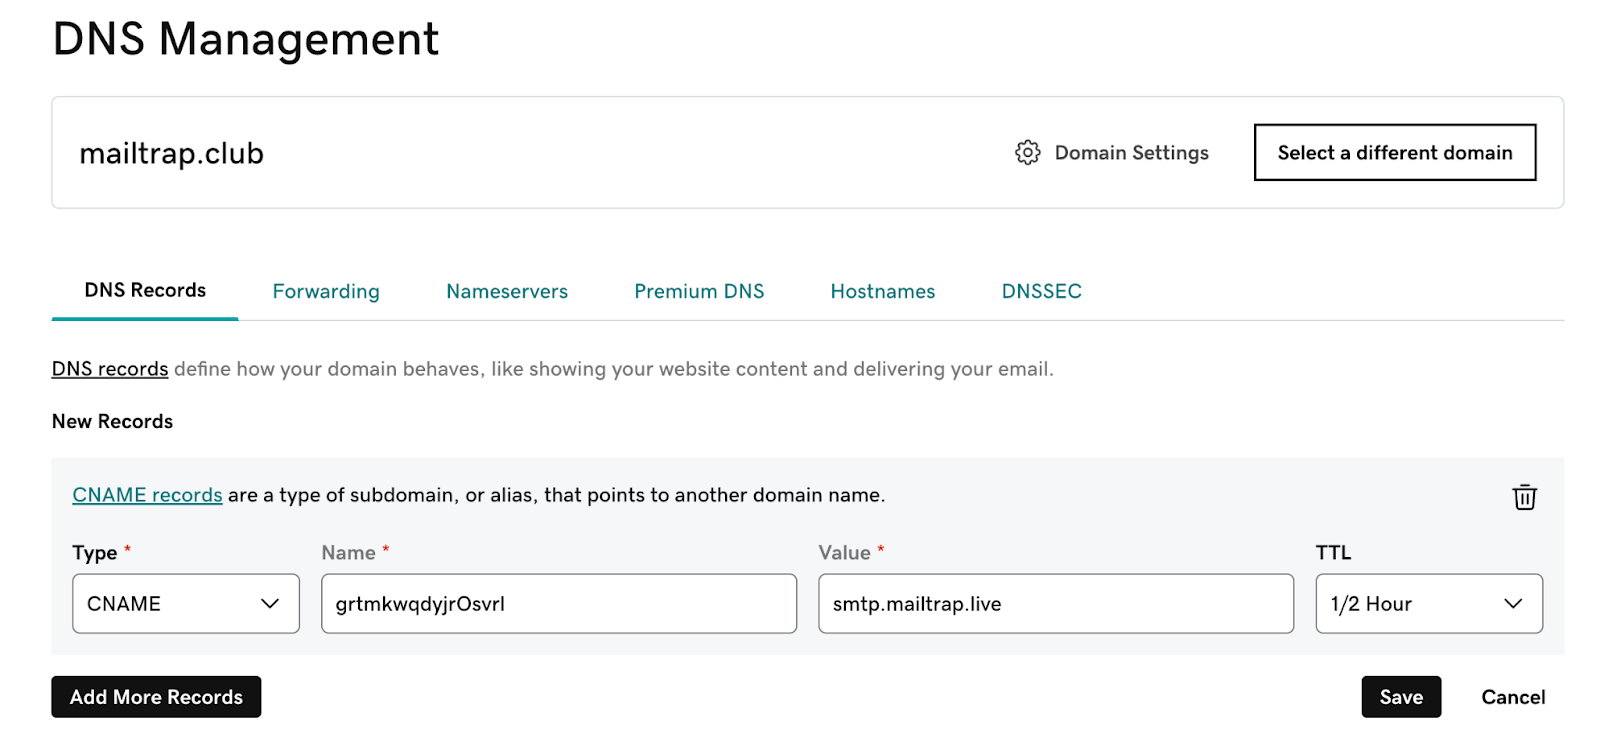
- Open the DNS settings and click Add New Record.
- Return to Mailtrap. You’ll need the values under Type, Name, and Value. The namings of these records in Mailtrap are the same as in GoDaddy.
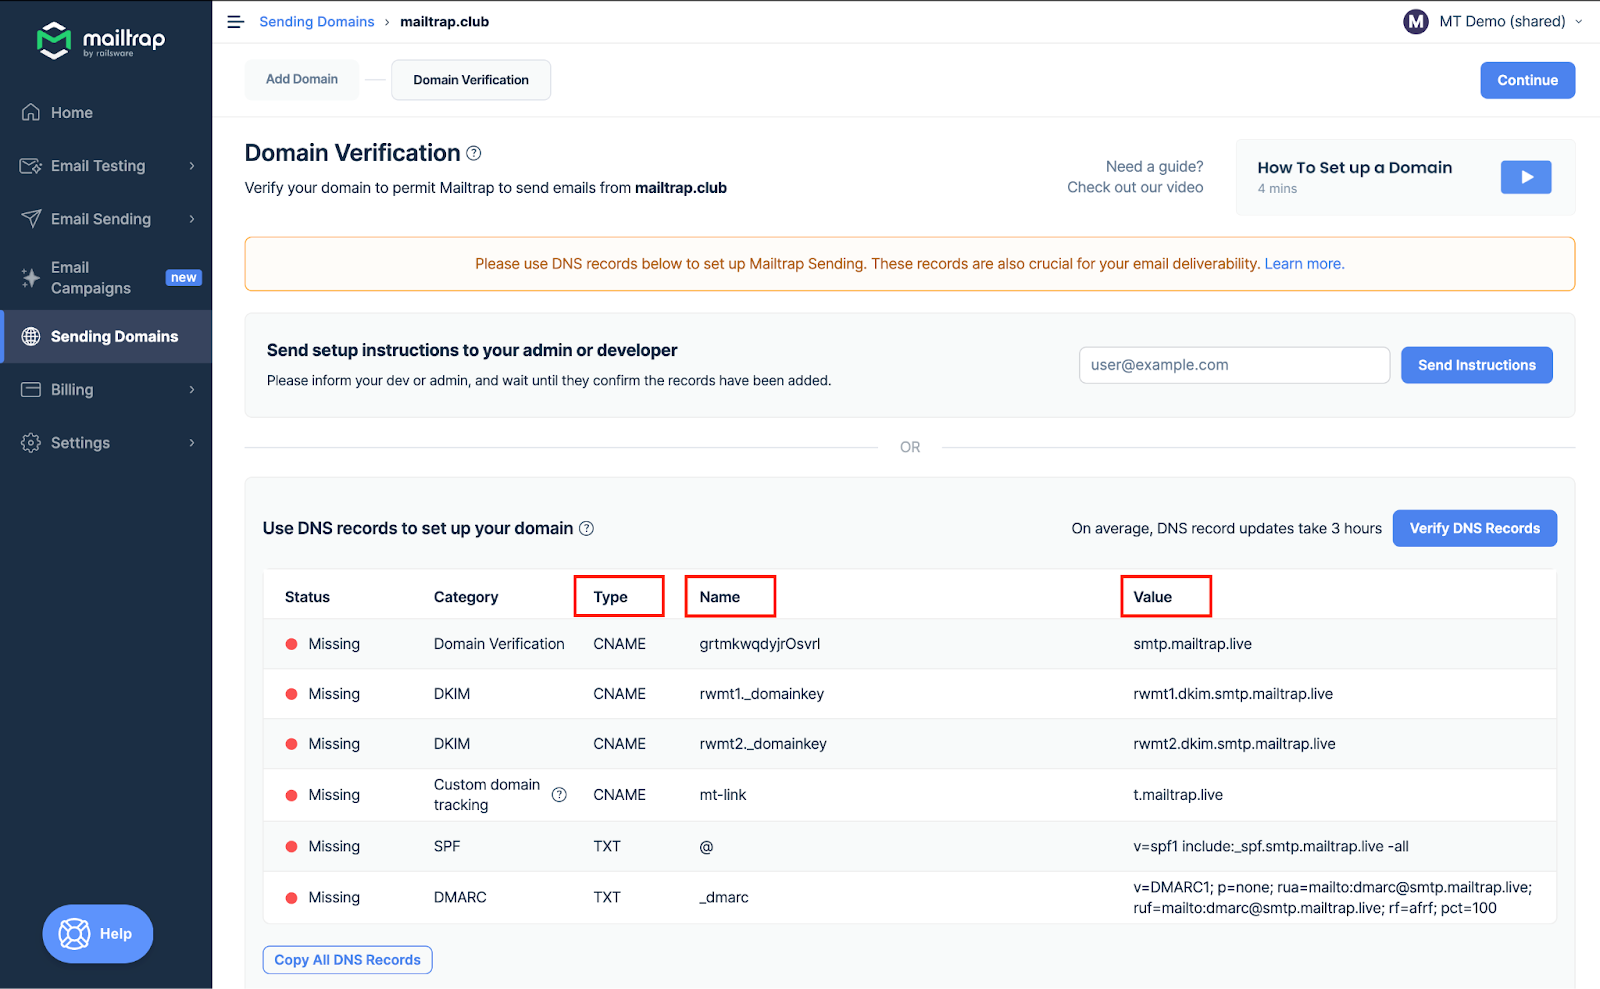
- Copy the Name and Value for each record one by one.
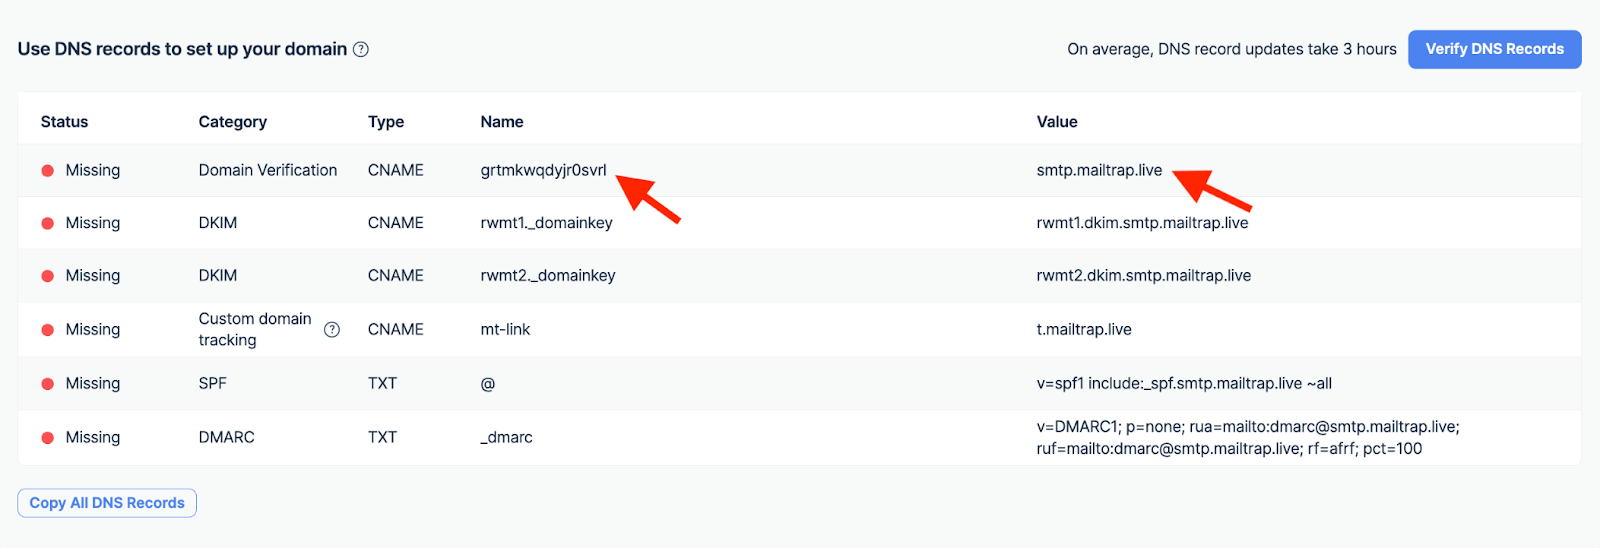
- And paste them into GoDaddy.
- Make sure you check the type next to each record in Mailtrap and choose a relevant one in your hosting provider. There are four CNAME type records (Domain Verification, DKIM (2), and Custom Tracking Domain) and two TXT type records (SPF and DMARC). Read this article for detailed information on each DNS record.
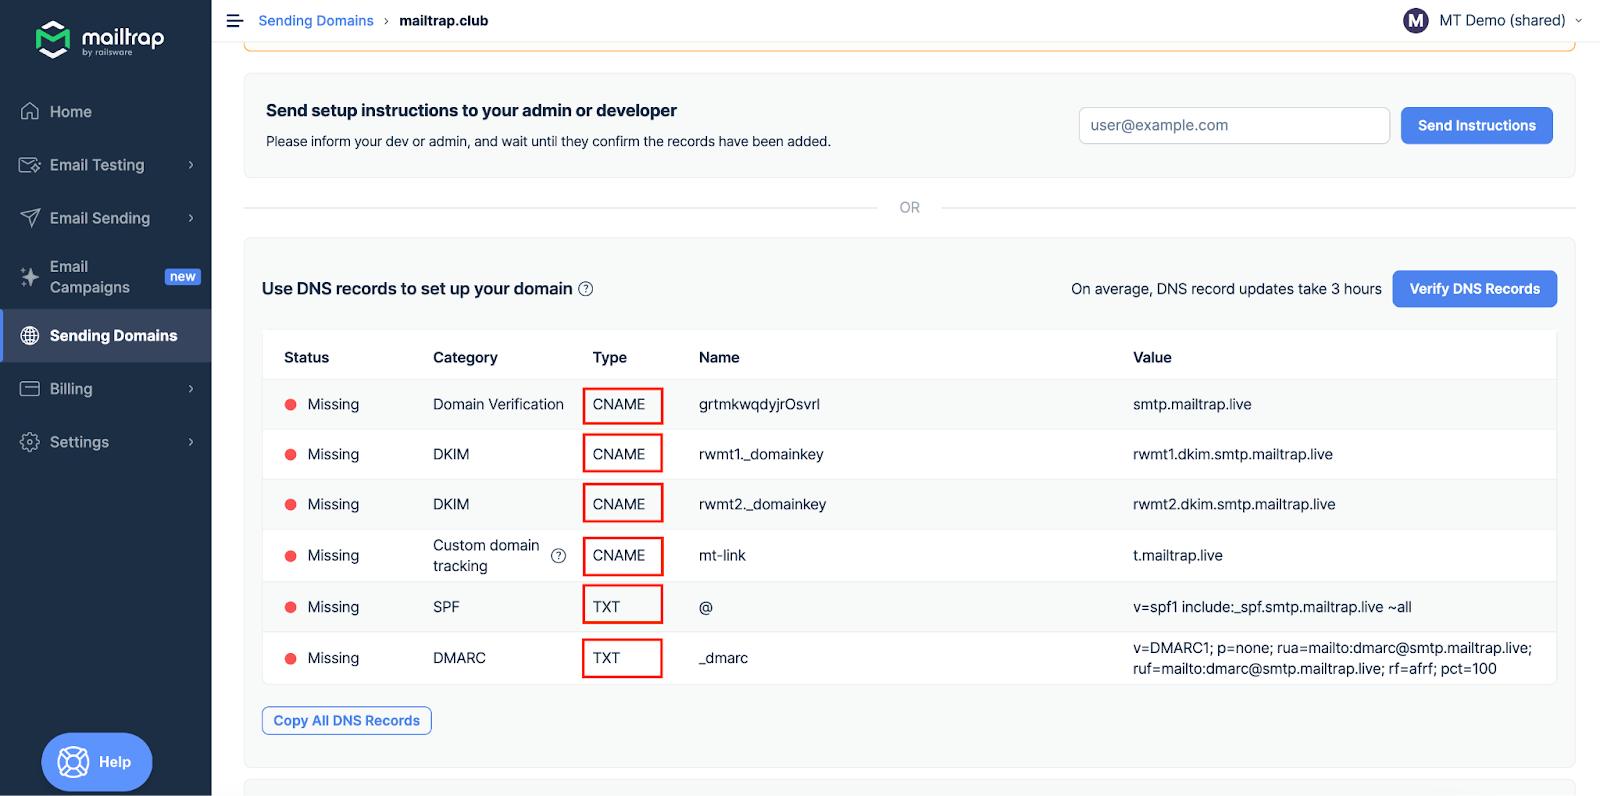
DNS Types and Categories in Mailtrap
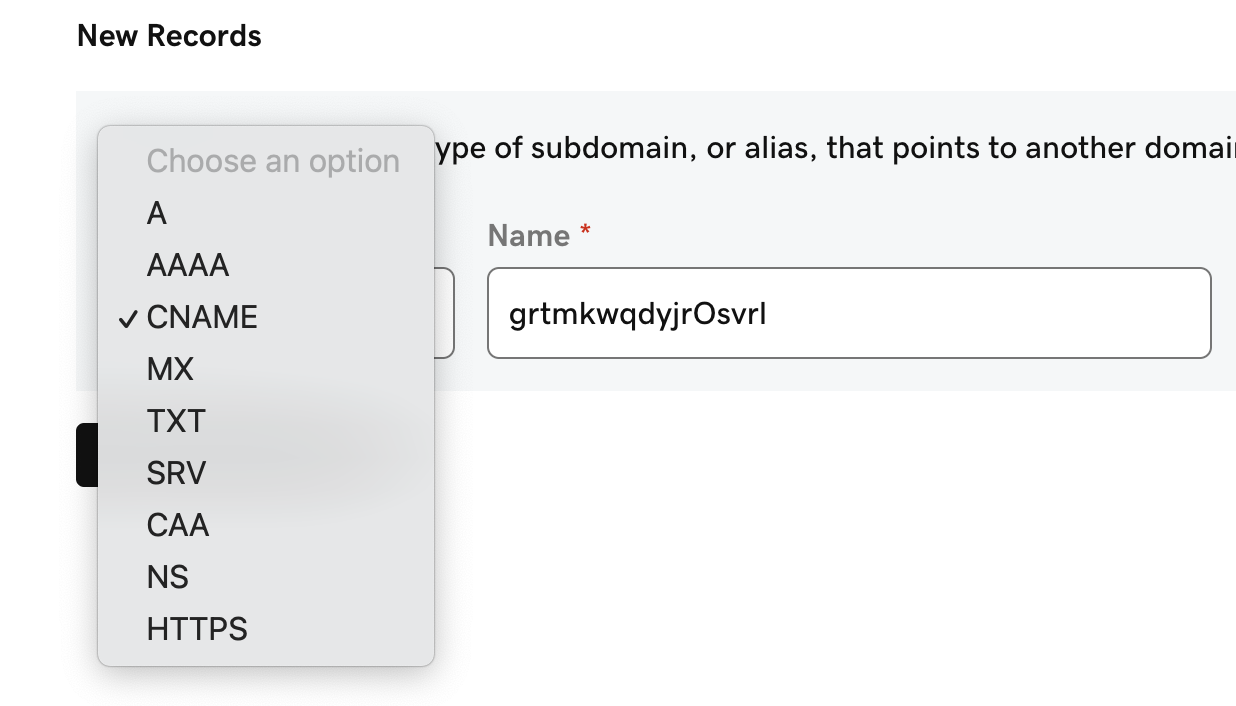
DNS record types in GoDaddy
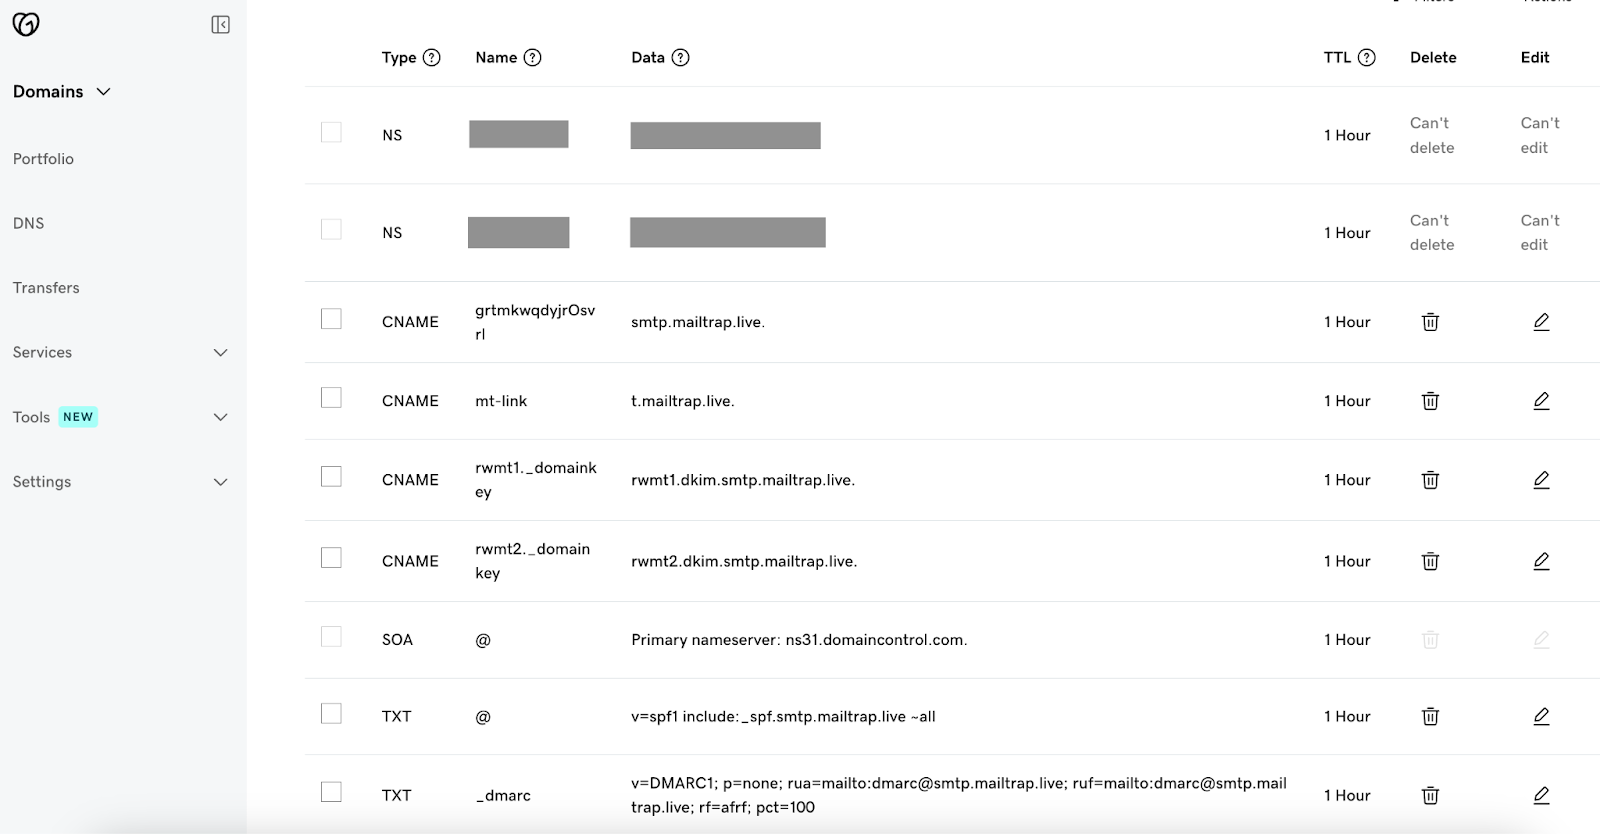
- Click Save after adding each record in GoDaddy.
- Repeat the process of copying and pasting for each record until you’ve added all the Mailtrap DNS records to GoDaddy.
- Then, return to Mailtrap and click the Verify DNS Records button.
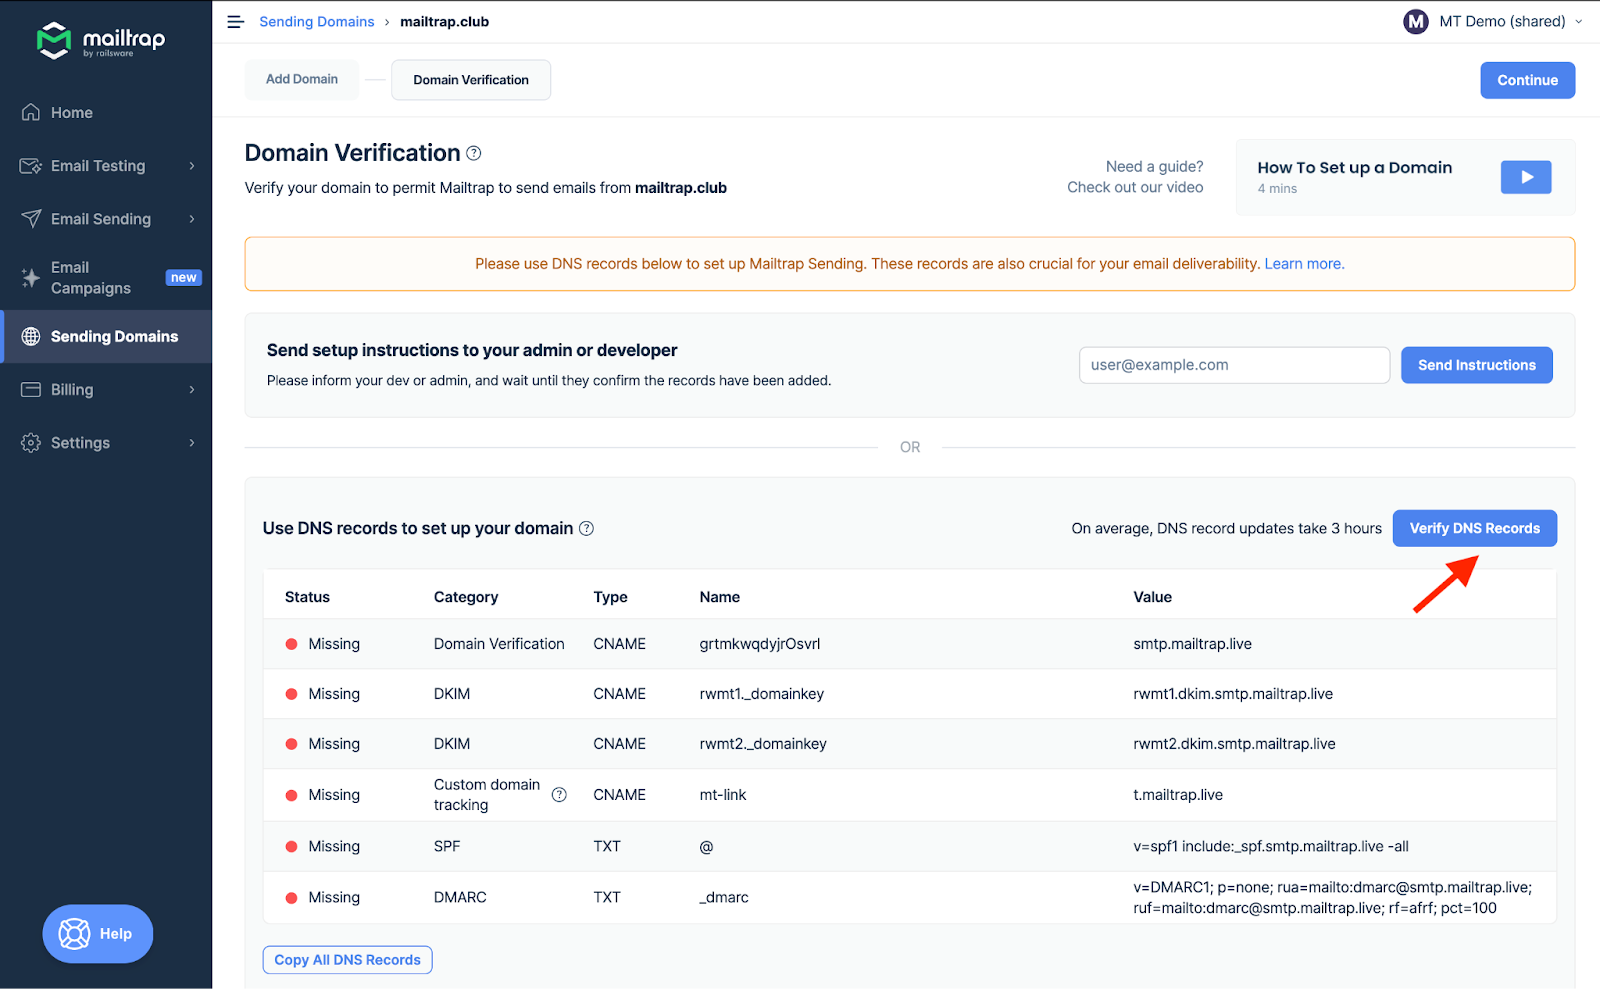
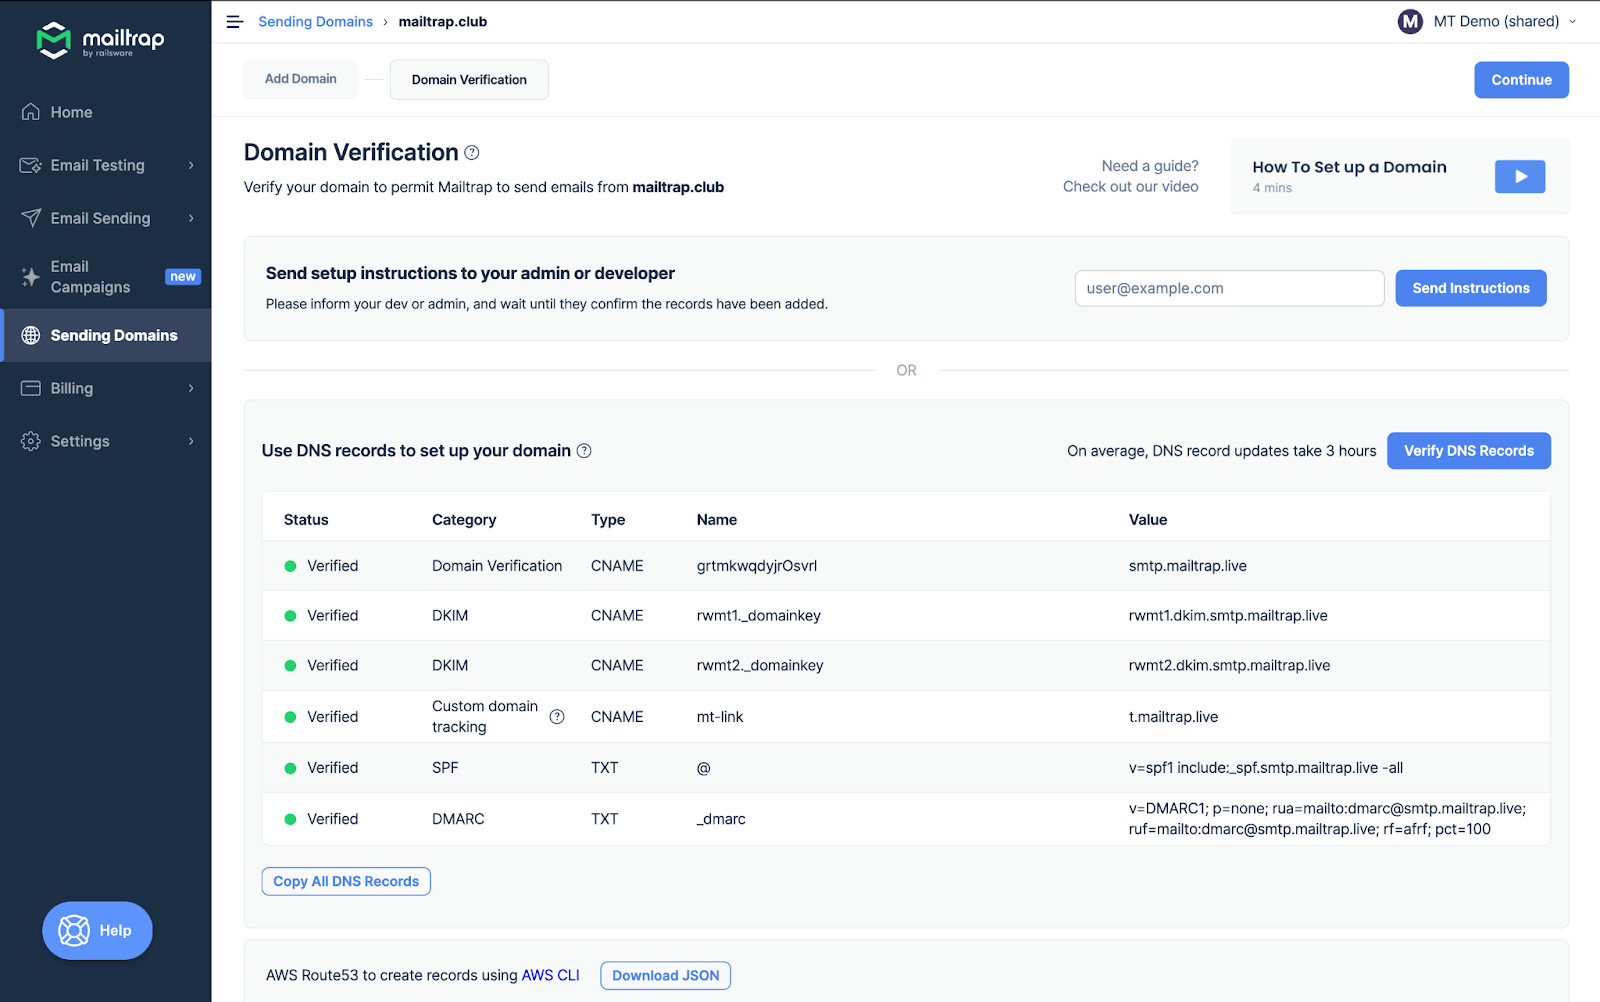
- Some records may be verified immediately, while some may take more time. Mailtrap will check the DNS records automatically every hour, but you can force a check by clicking the Verify DNS Records button again. The Status will change from Missing to Verified, and the red dot will turn green.
Cloudflare setup
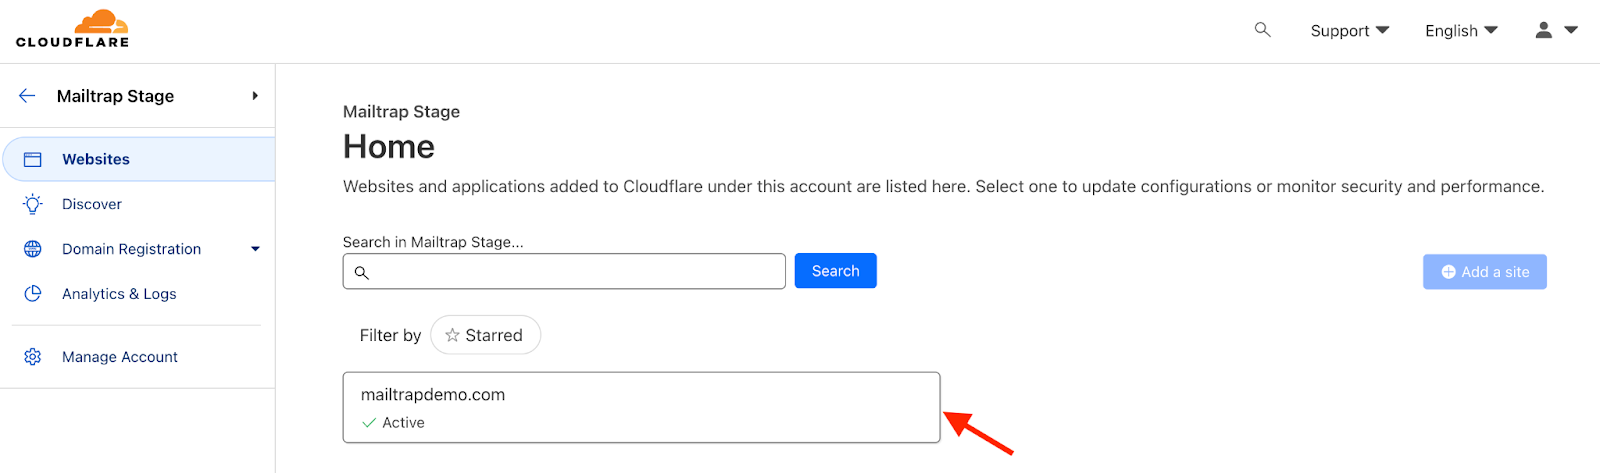
- Open the Cloudflare dashboard and click the domain you’ve added to Mailtrap.
- Click DNS in the left navigation panel. This will open DNS records.

- Click the Add Record button.
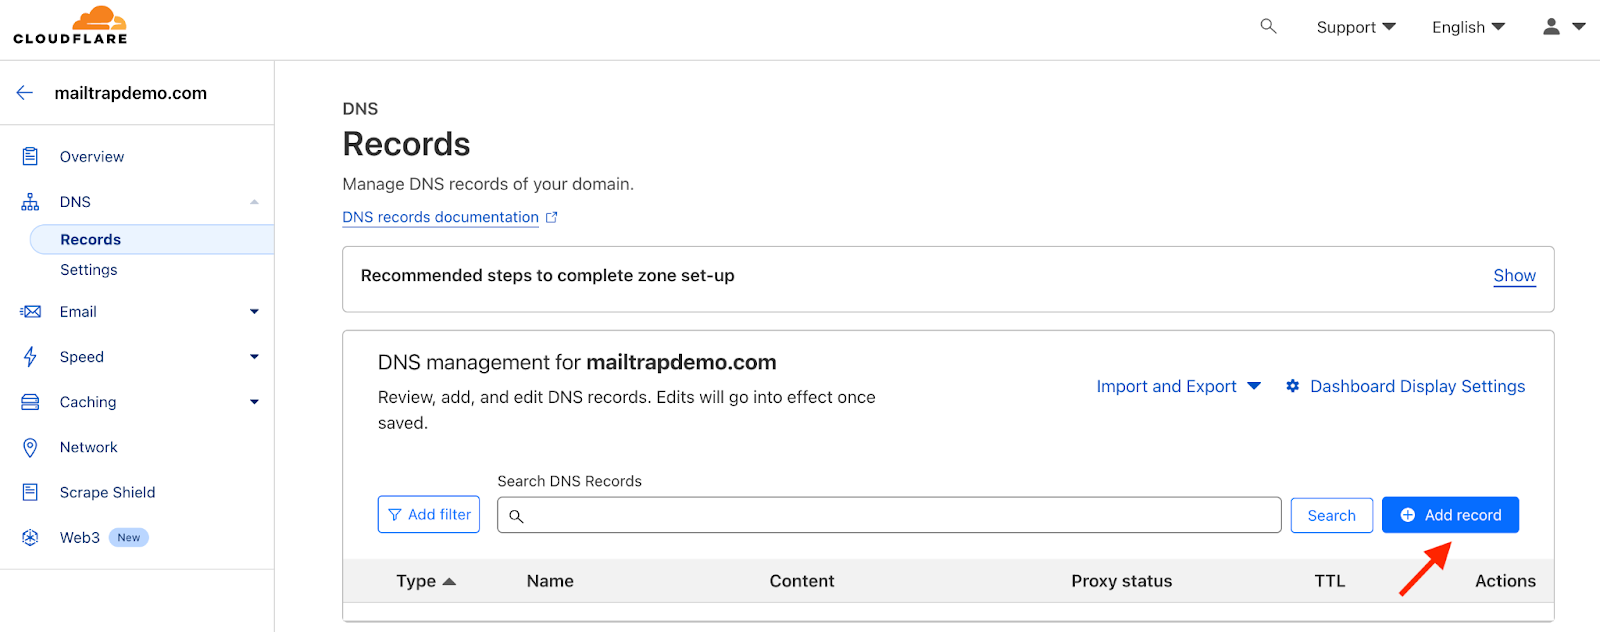
- Return to Mailtrap and copy each record one by one. Once again, you’ll need Type, Name, and Value. For CNAME records, Cloudflare refers to the Value field as Target. For TXT records, the Value field is referred to as Content. Make sure you select the correct type from the dropdown menu.

- If you’re not using proxy, make sure you disable it. By default, it will be enabled.

- Click Save and repeat the process for all the remaining DNS records.
- When you’re done, click Verify DNS Records in Mailtrap.
Google Domains setup
- Open the Google Domains dashboard and choose the domain you added to Mailtrap.
- Go to the DNS menu.
- Click the Custom Records tab and add all six records, keeping the following in mind:
- Google’s Host name is the same as Mailtrap’s Name. Similarly, Google’s Data is equal to Mailtrap’s Value field.
- Add SPF record as TXT type, ignoring Google’s SPF type. Records added this way won’t be verified correctly.
- When adding the SPF record, don’t add anything in the Host name field.
- Save the records and click Verify DNS Records in Mailtrap.