Email Templates
- Creating a template
- Drag & Drop Editor
- Code Editor
- Template debugging
- List of templates and user permissions
Overview
Email Templates allow you to design, edit, and host HTML email templates, and reference them via API.

By storing the template on Mailtrap and calling it via API, you can easily change the template code without committing to your codebase.
Email Templates support Variables, and Mailtrap uses Handlebars as a template engine.
You can put {{user_name}} into your template and pass “John” as the “user_name” value via API. For more, check our article on using Handlebars syntax with Mailtrap.
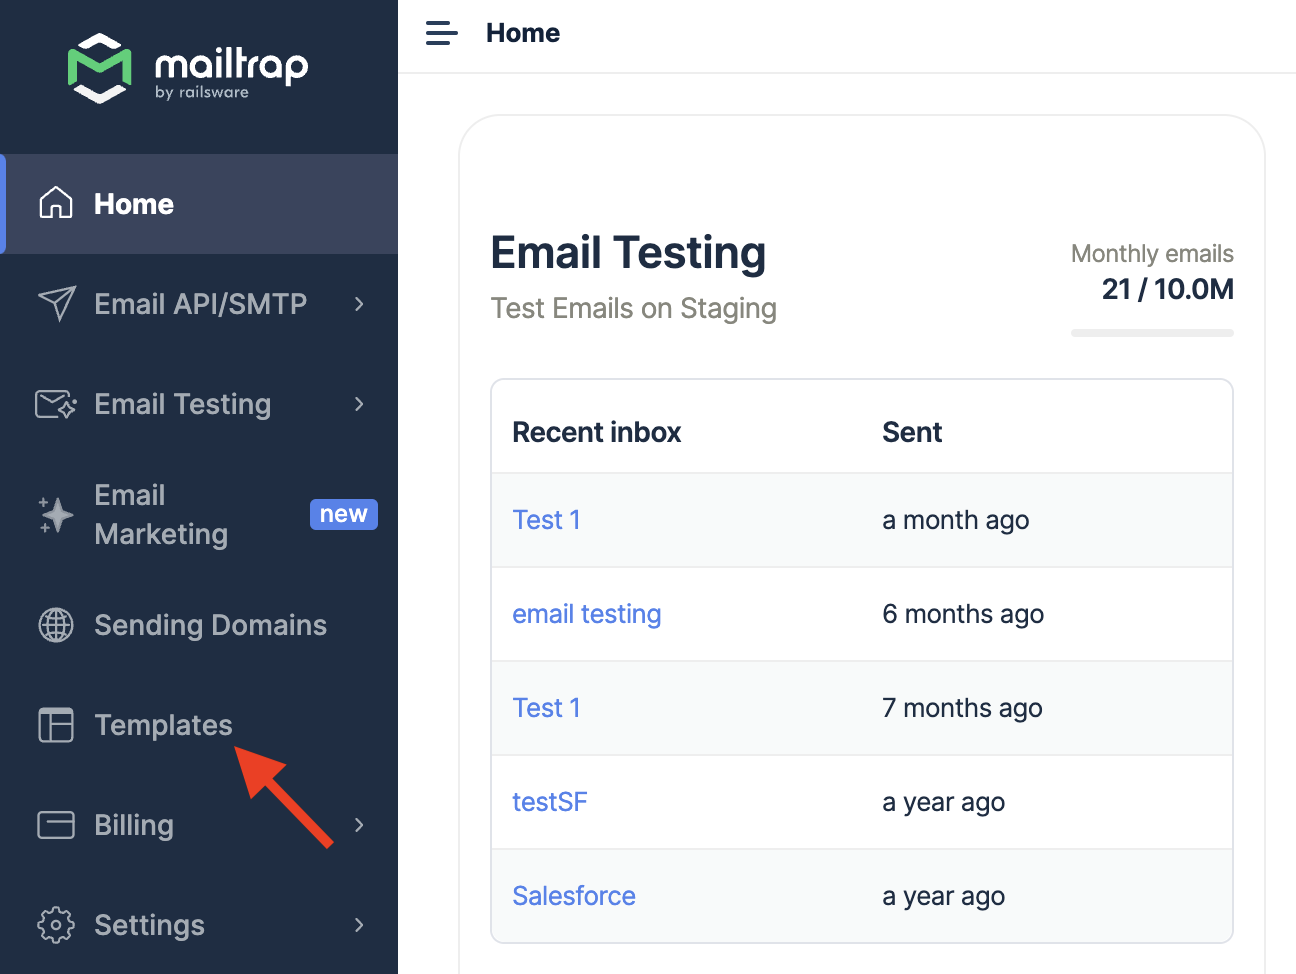
Creating a template
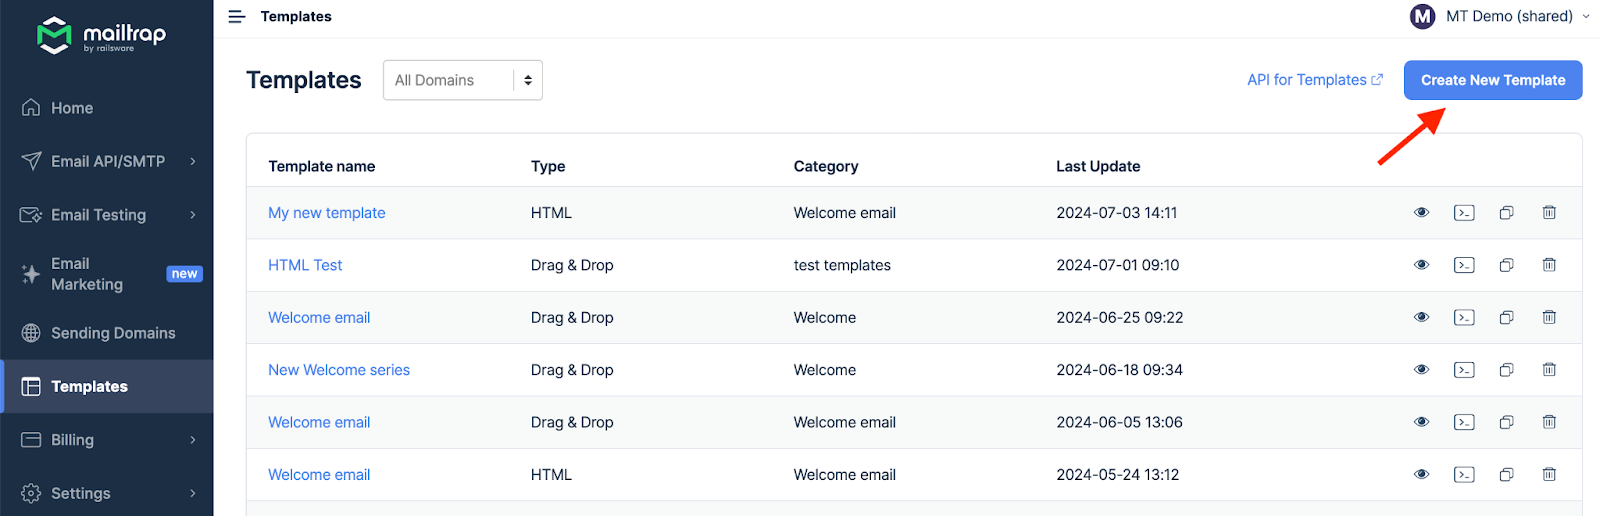
- Navigate to the Templates menu.

- Click the Create New Template button.
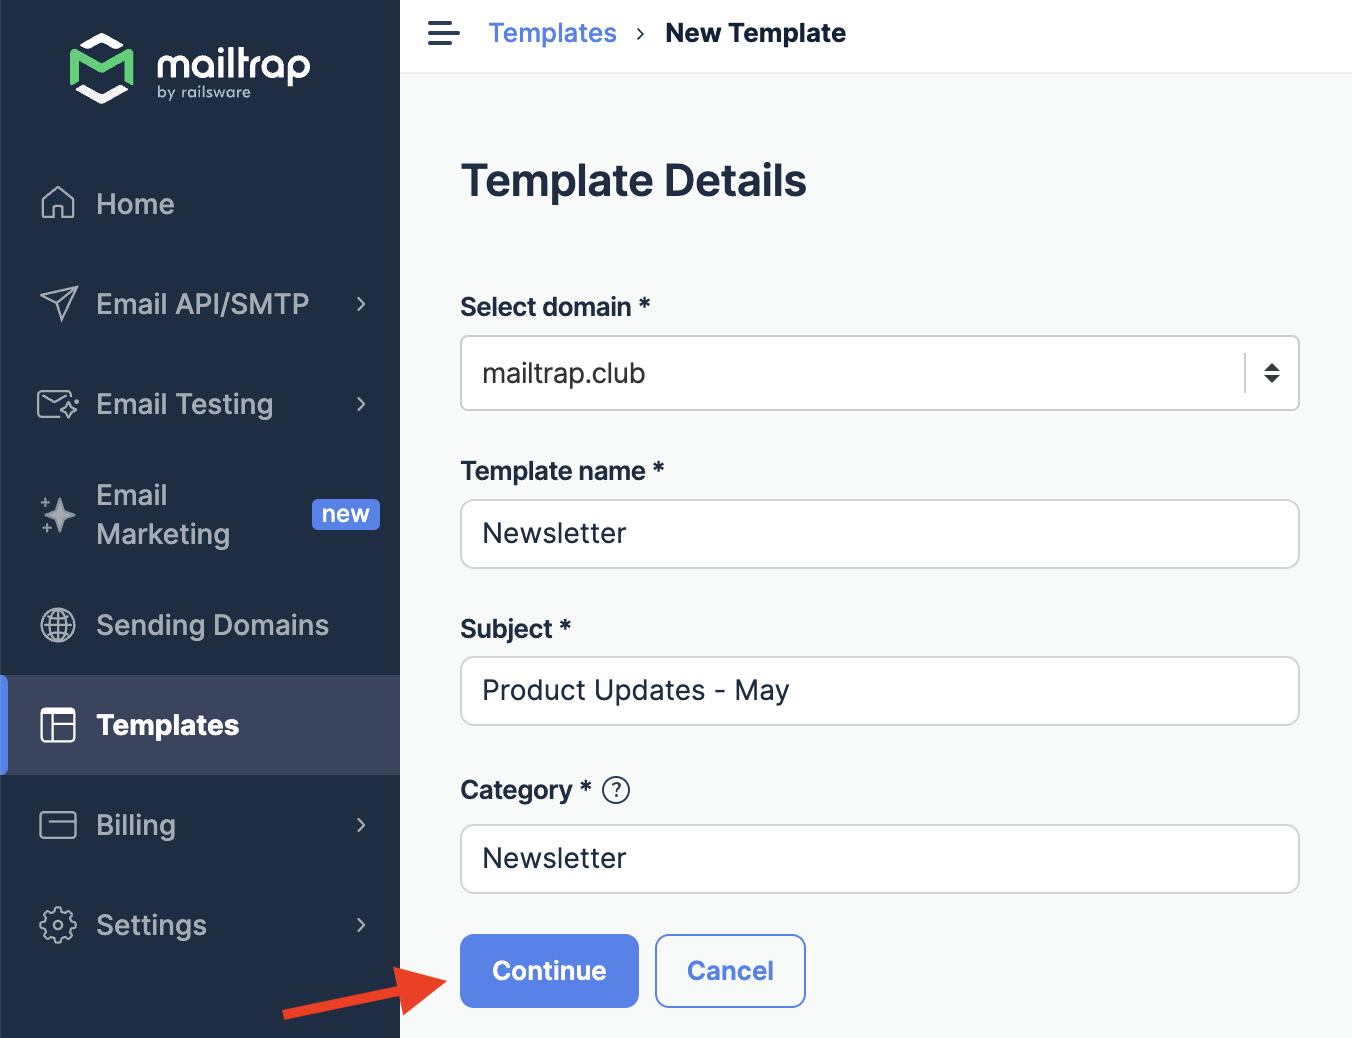
- Click the drop-down menu to select one of your domains, enter the Template name, Subject, and Category, and click Continue.
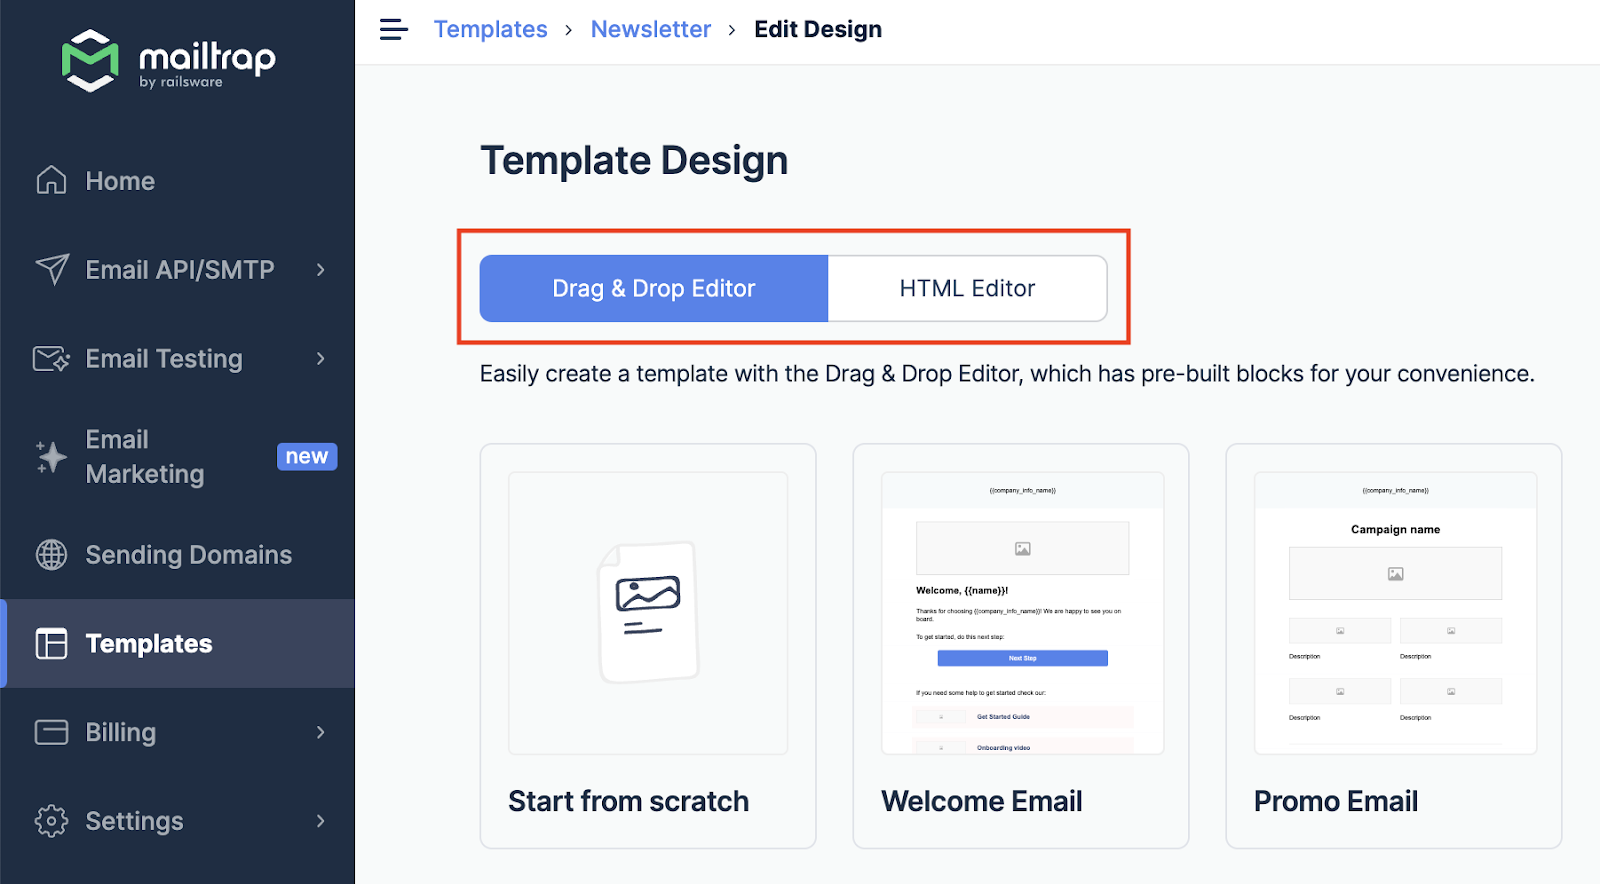
- Choose the Drag & Drop Editor to build the template without coding, or select HTML Editor if you prefer to write/modify the code.
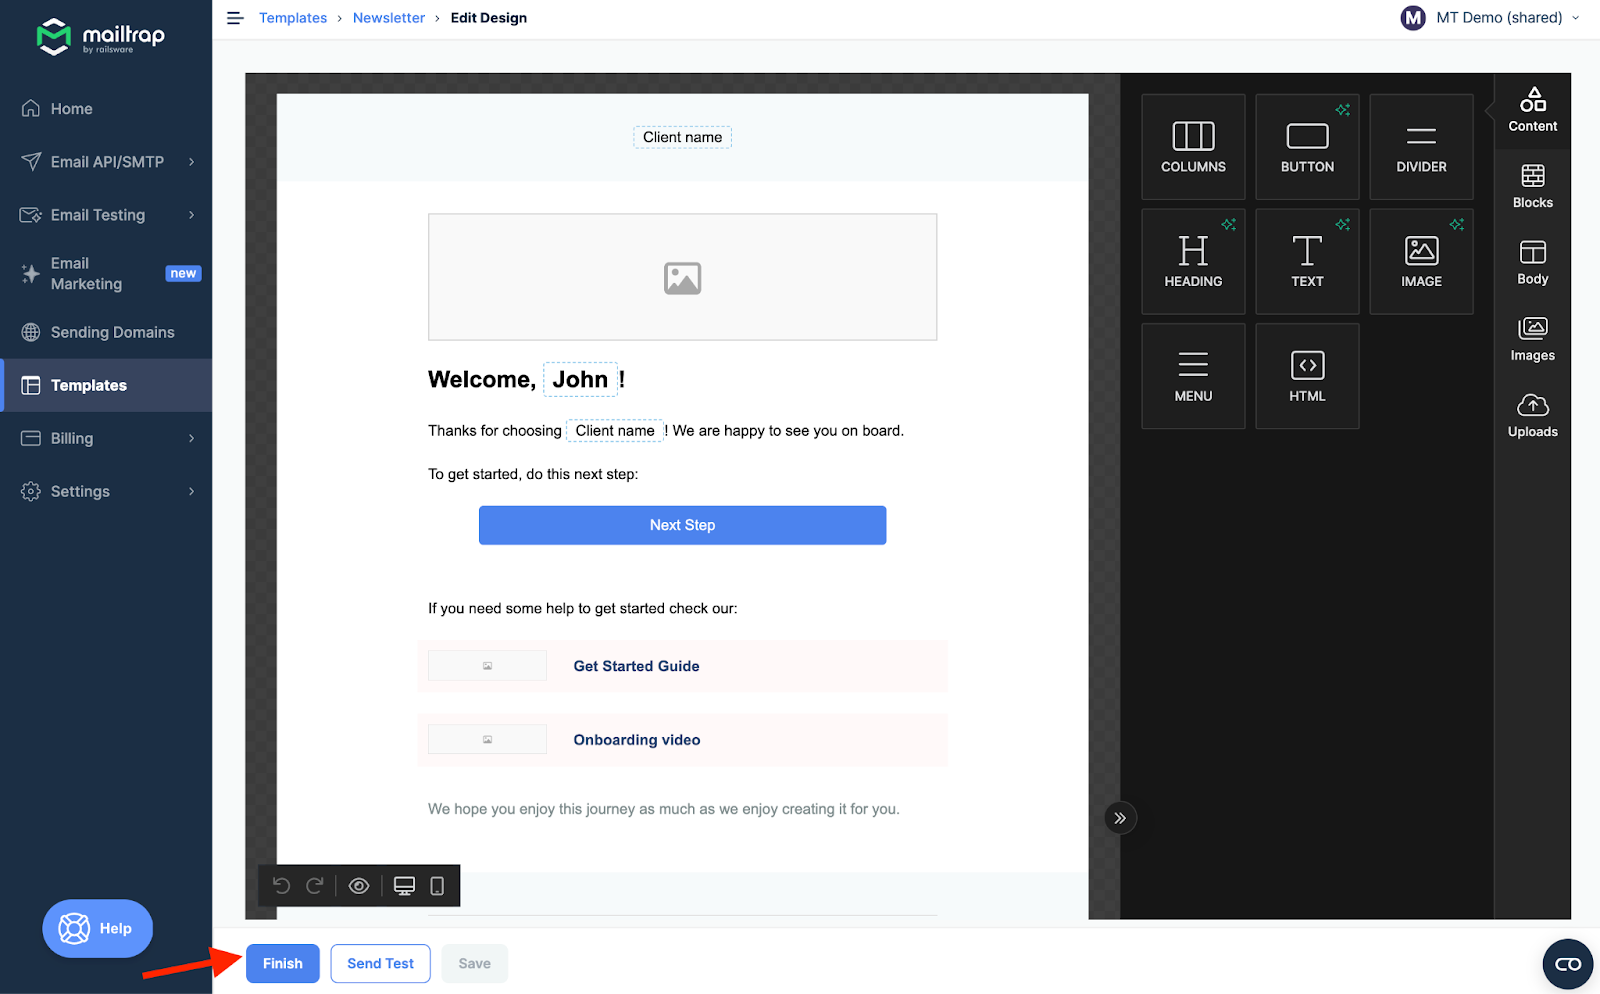
- Create/modify the design and click Finish.
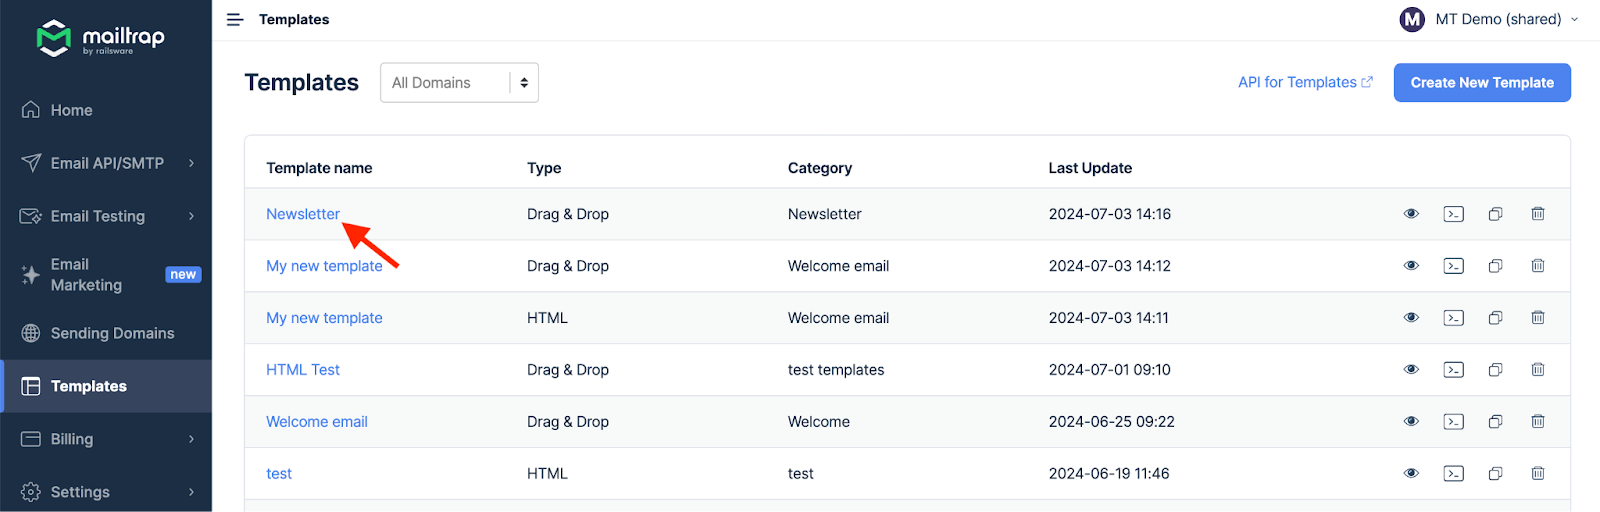
- The main Templates menu features all your saved templates. To quickly access a saved template, just click on it within the main menu.
Editing and customizing templates
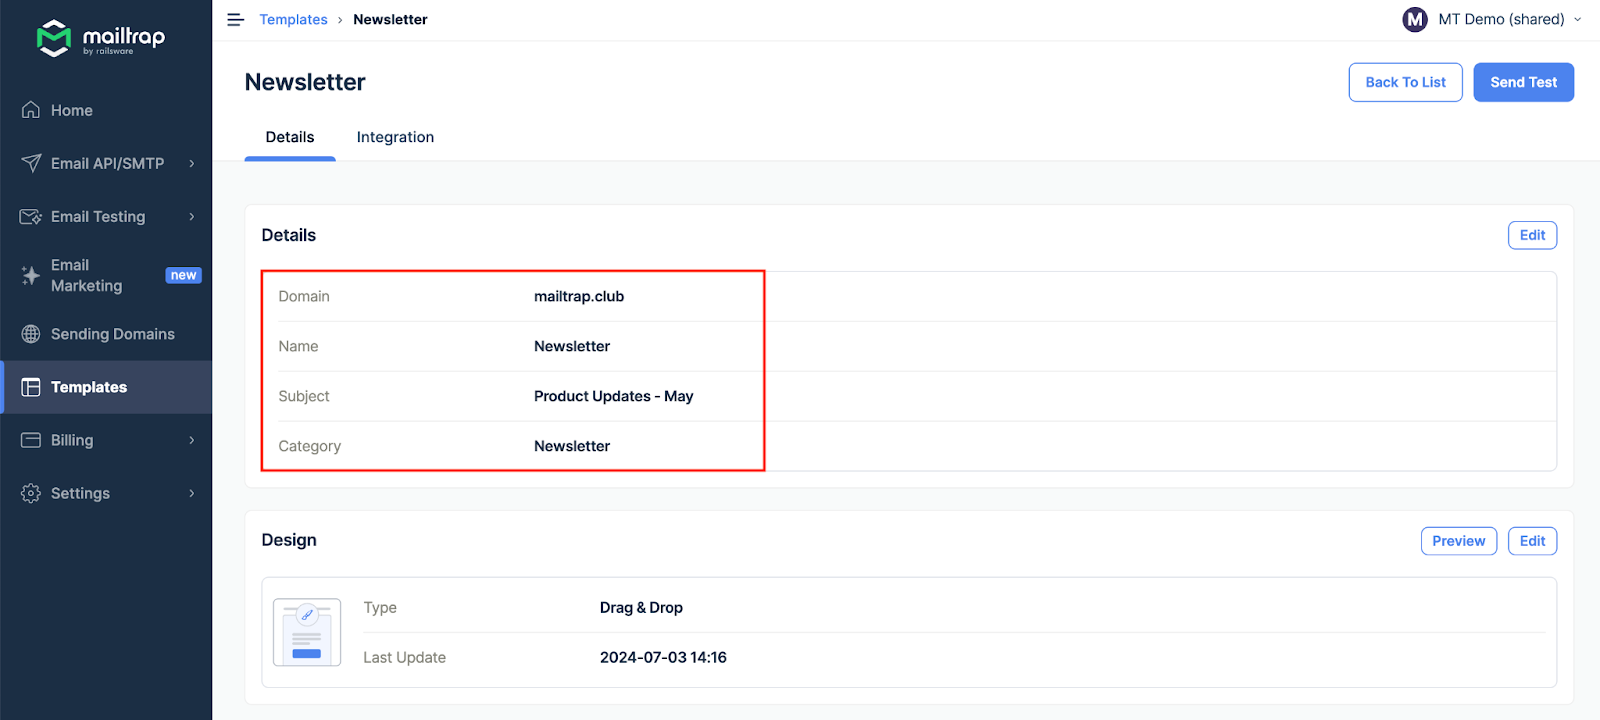
Details
Each template must have a name, subject, category, and assigned domain. The subject also supports variables.
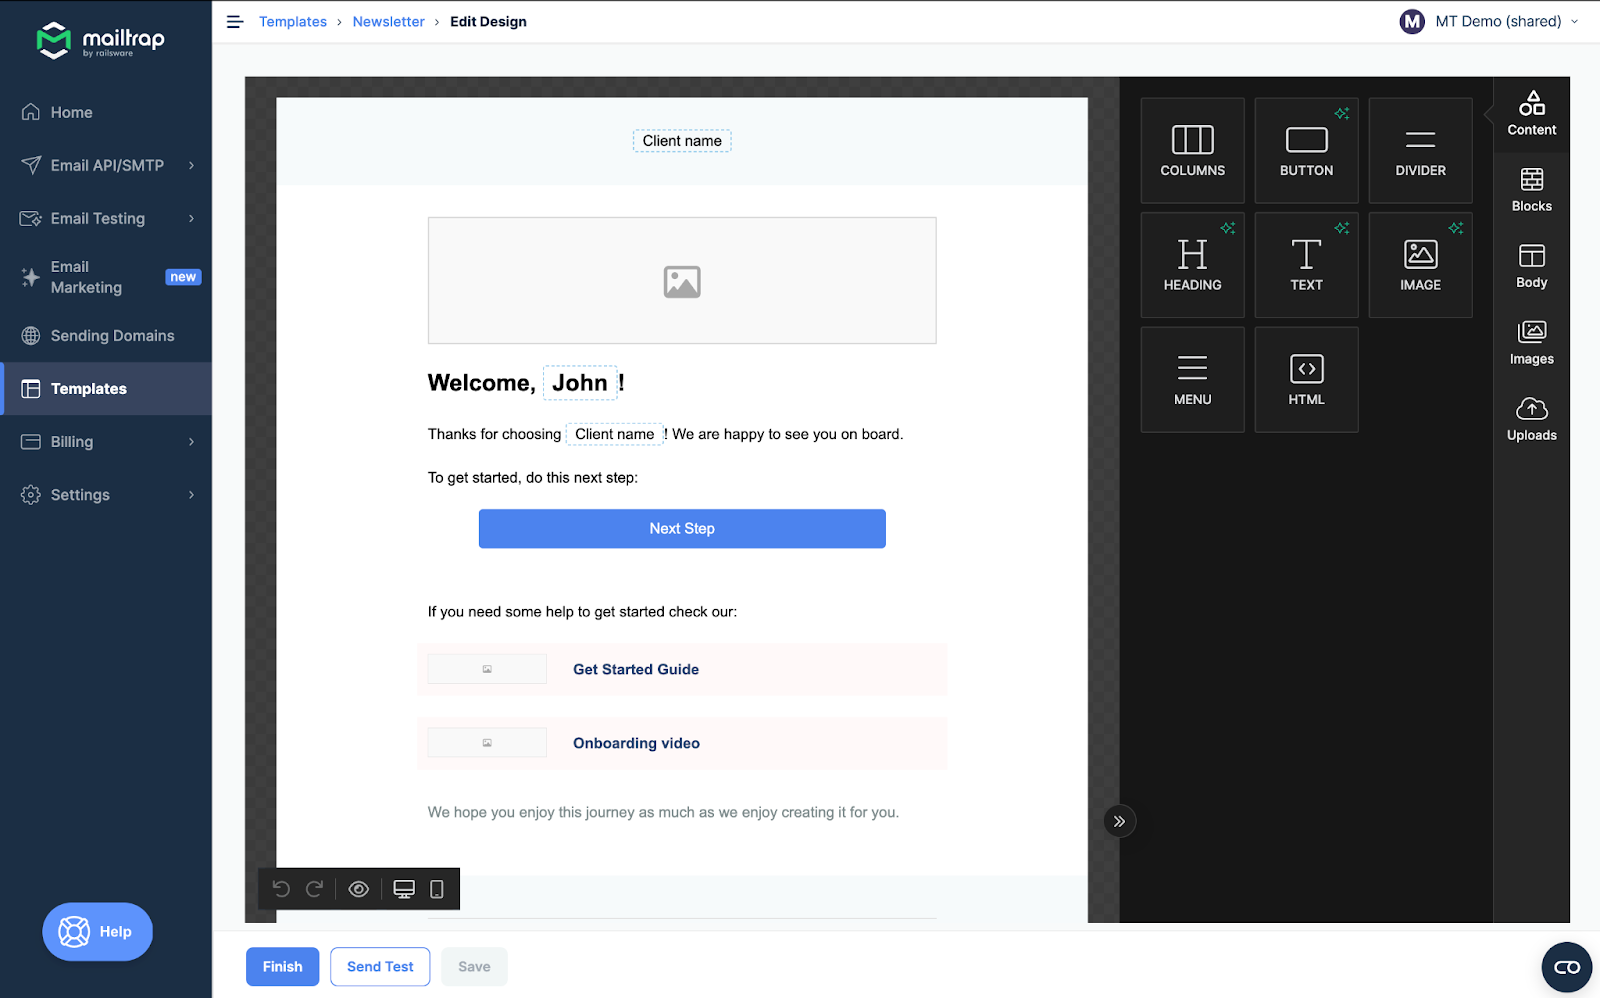
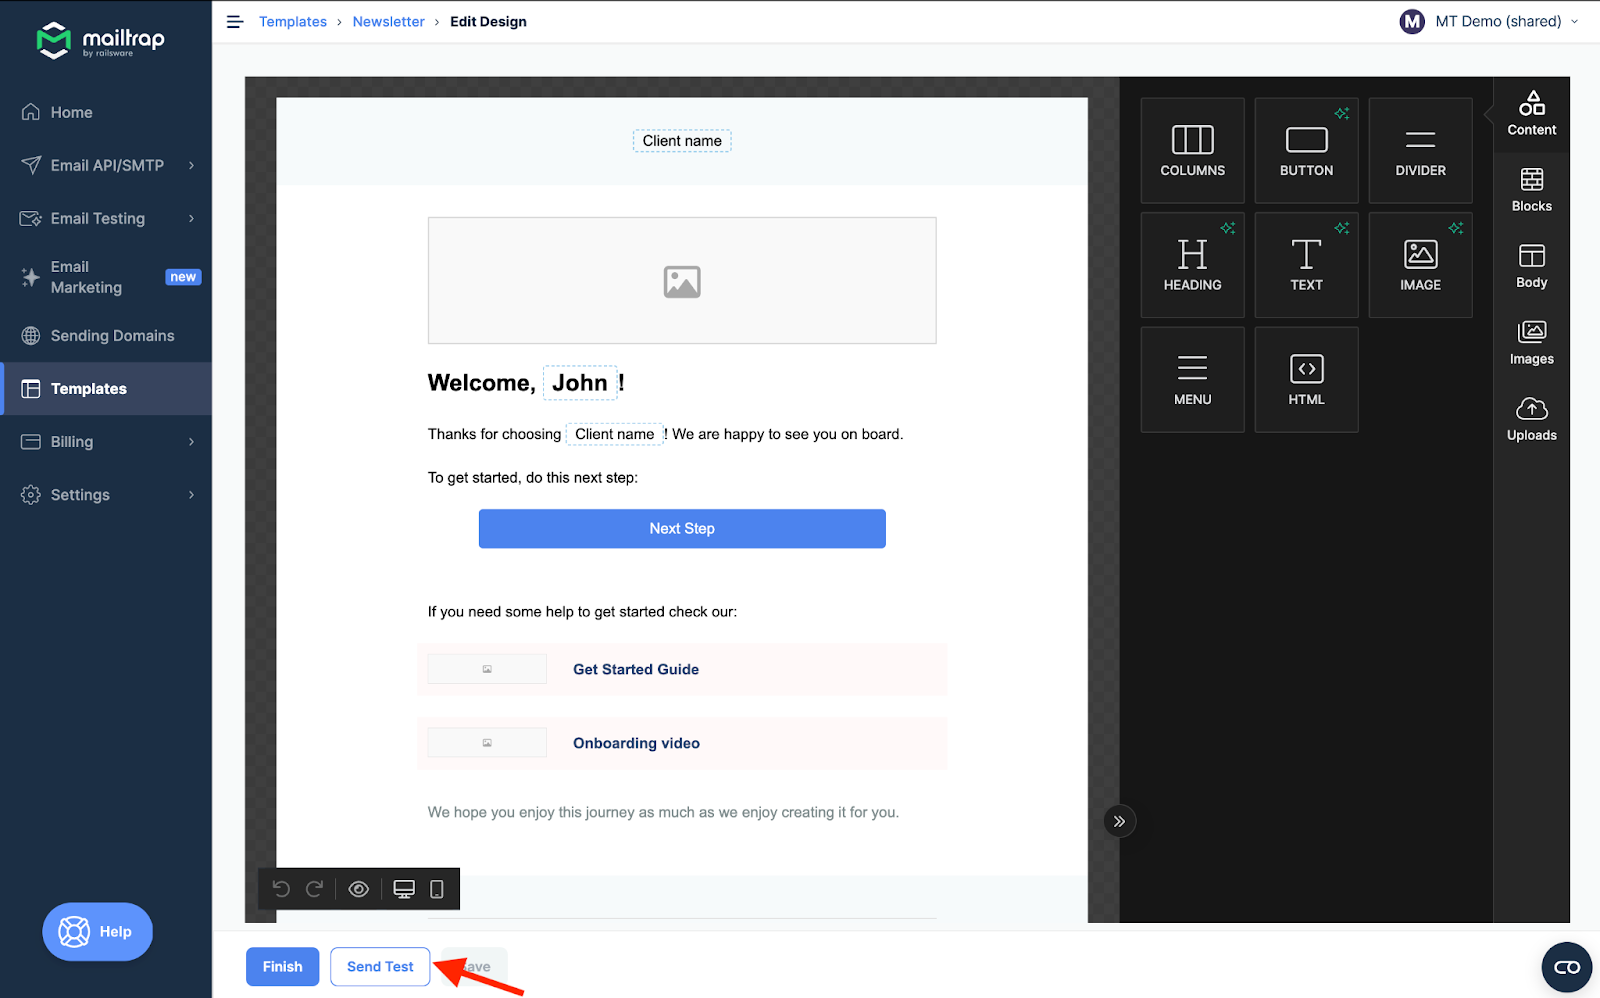
Drag & Drop Editor
The drag-and-drop editor allows you to design templates without any coding.
Code Editor
Code Editor allows you to edit the HTML or Text content, depending on the emails you want to send.
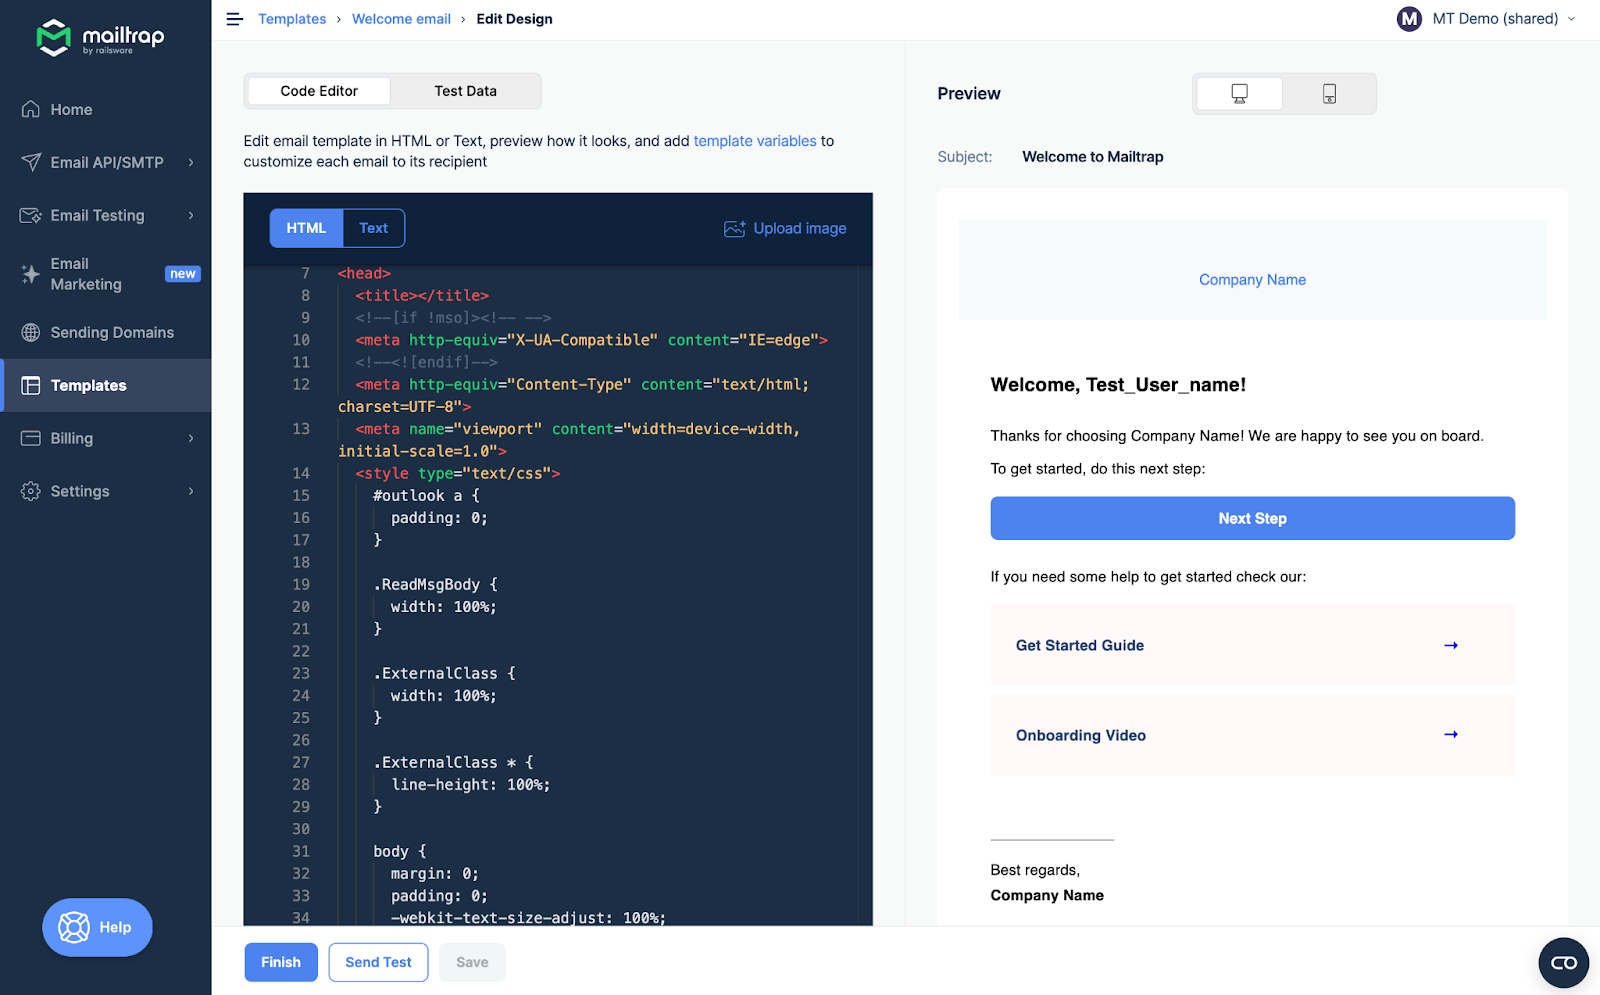
The editor supports Find and Replace options, and you can use Cmd+F or Win+F as a hotkey to reveal a quick search bar.
If your template has an error, Handlebars cannot render it. You’ll see an error message in the Preview tab, and the RAW code with an error will be highlighted in the Editor.
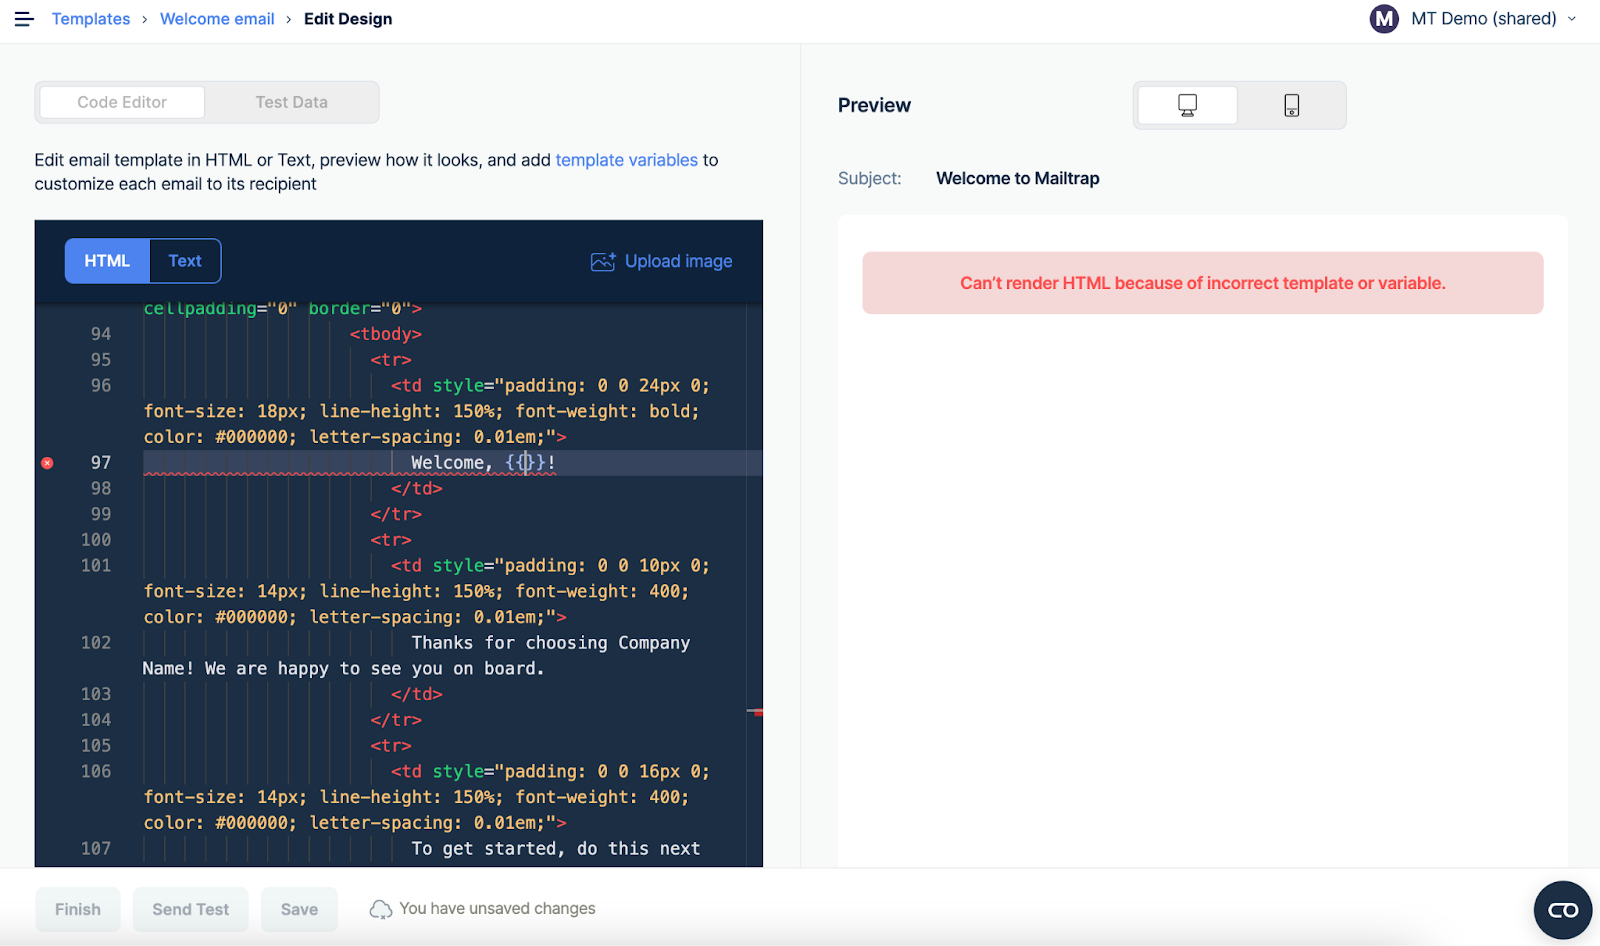
You can’t save a template with errors, either. Remember that we don’t validate HTML.
Uploading an image
1. Click Upload image in the upper right corner of the Code Editor.

2. Hit the Upload New button in the following menu and choose an image from your local drive (Supported formats are JPG, PNG, and GIF, and the maximum file size is 2 MB).
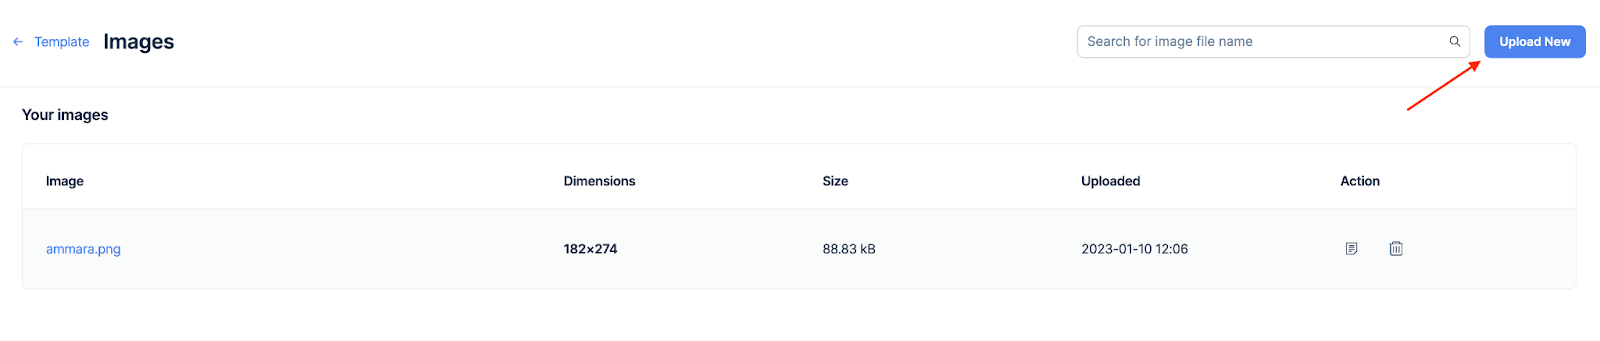
3. Once the image is uploaded, you will receive a confirmation notification. If the file format is unsupported or the image is too big, you will receive the corresponding error message.

4. Click the Copy URL button to copy the image URL to your clipboard, then click Template to return to the editing menu.
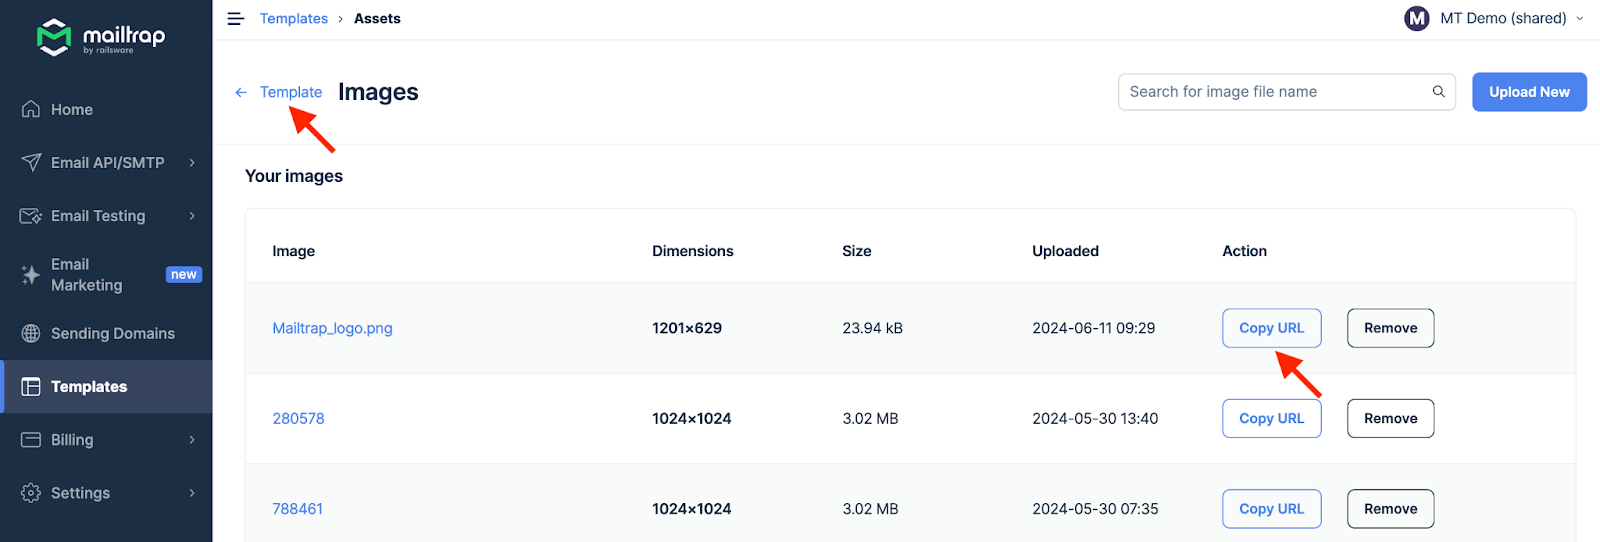
5. Proceed to add the image to the template body under the <img> tag. You can preview it in the template as soon as the asset is added.

Test Data
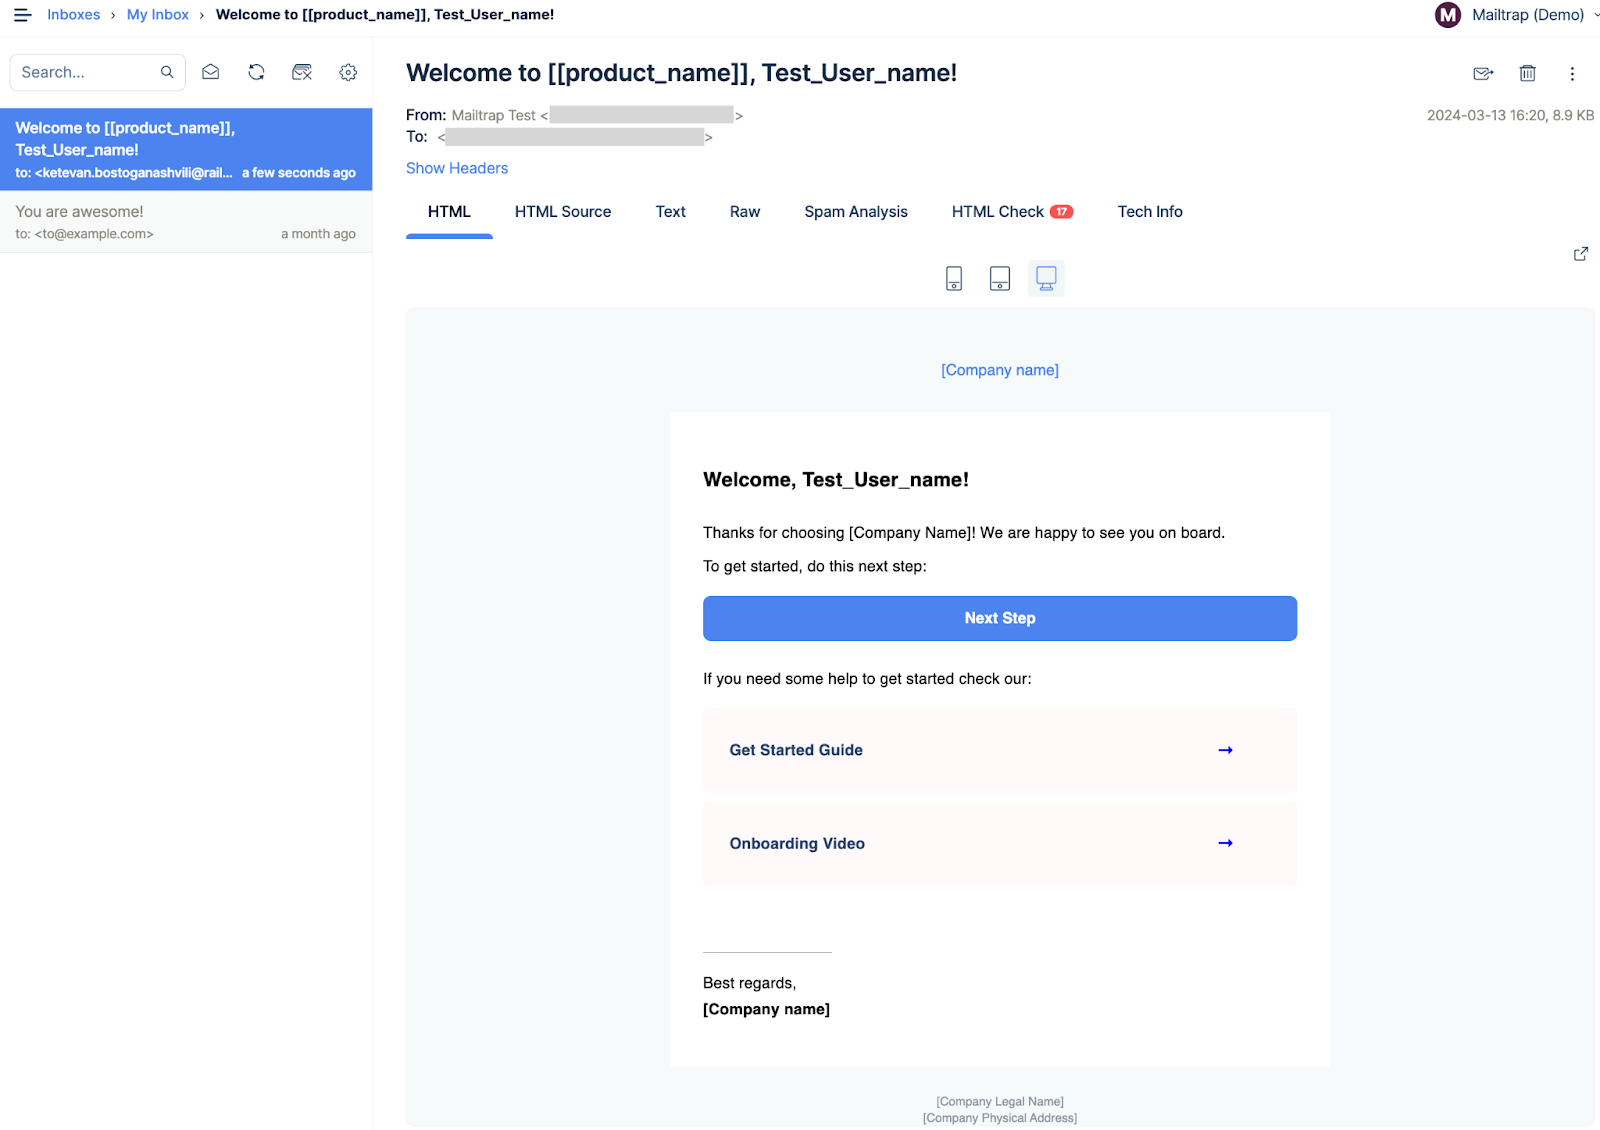
Code Editor automatically parses your template and shows all the variables found. The Test Data tab helps you preview the object variables.
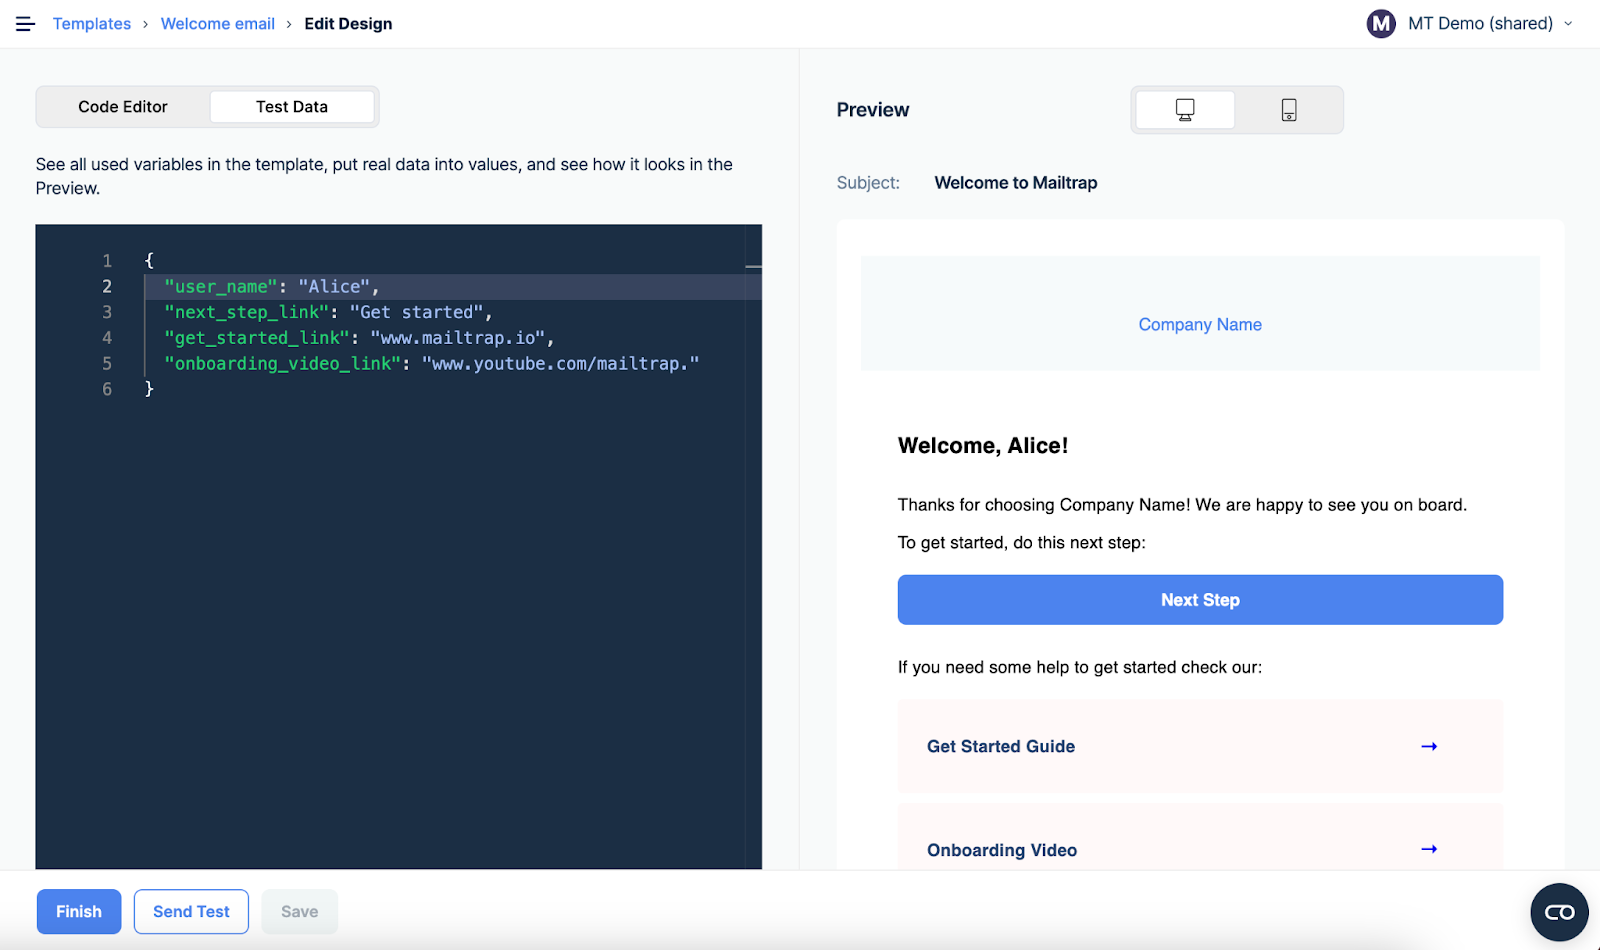
By default, as a value, we put a variable name and add the “Test_” prefix.
Send test
If you’re using email templates in production, you can send a test email to the account owner's email address to run basic tests. Simply press the Send Test button.
Important Notes:
- Your domain should be verified to send a test.
- Each test email is billed over your quota.
Template integration - Email API/SMTP
- Navigate to Templates in the menu on the left.

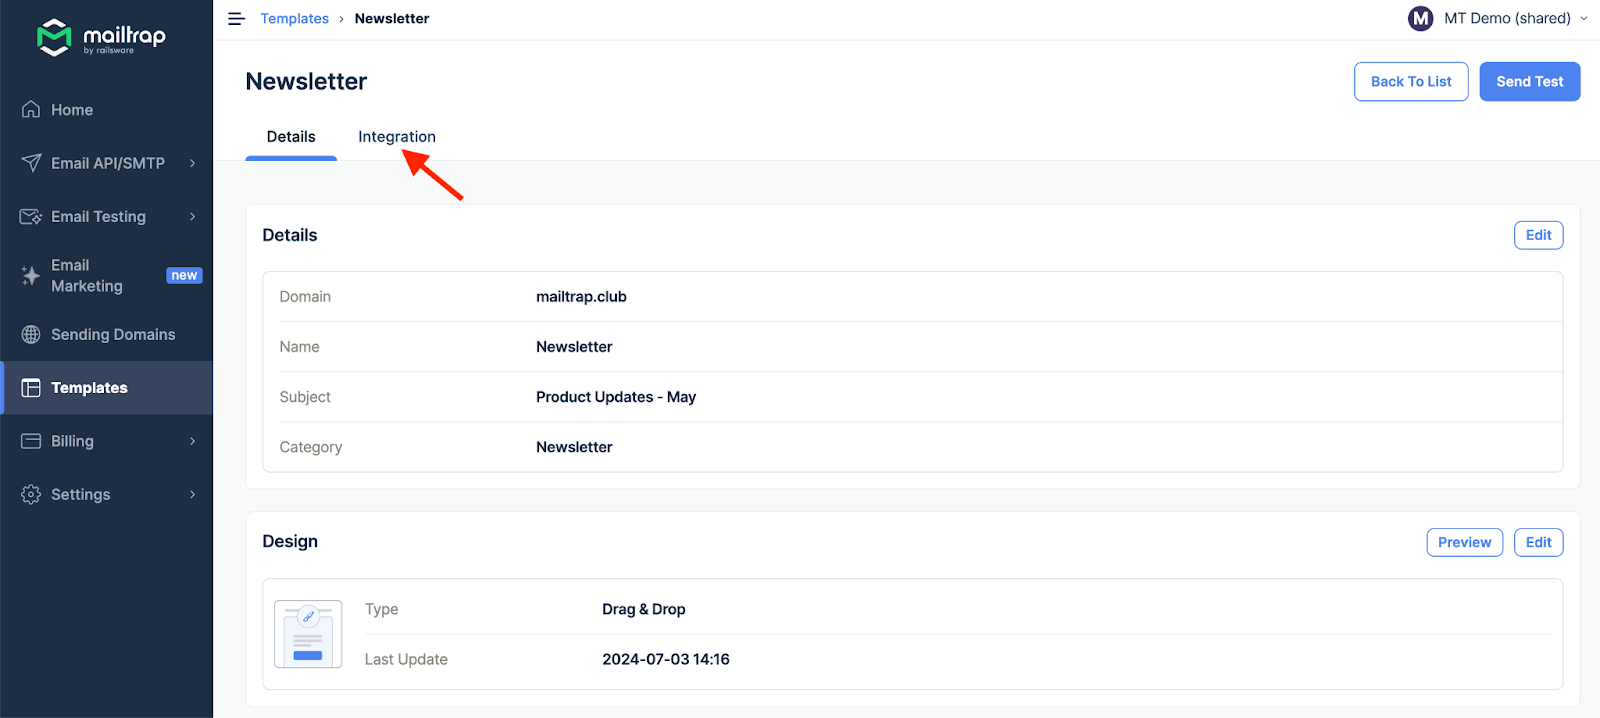
- Click the template you want to call using the API.

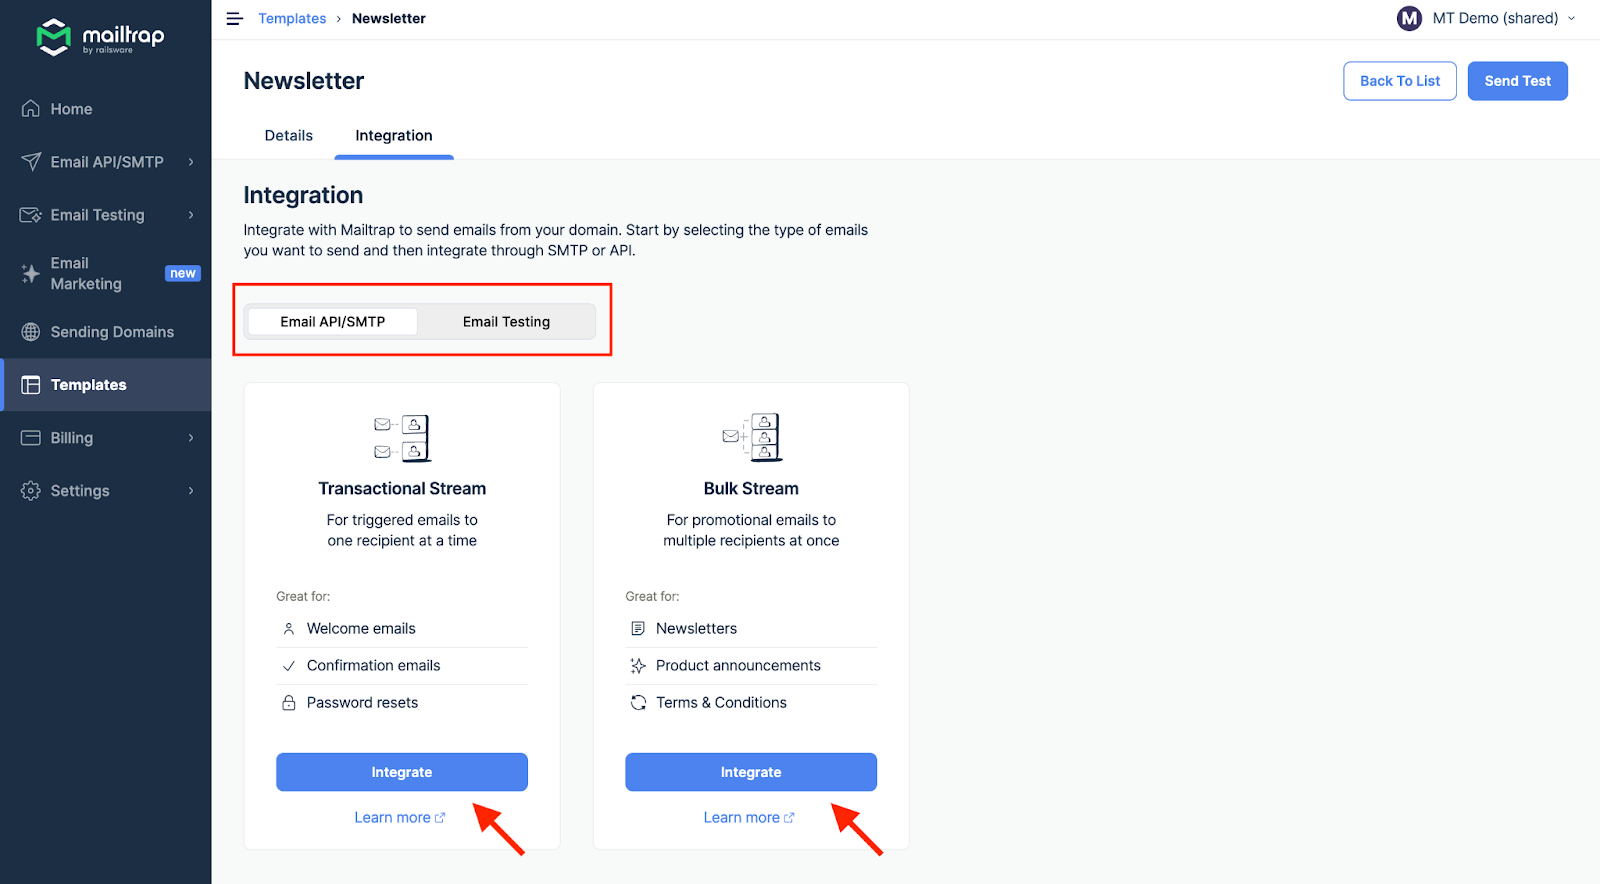
- Open the Integration tab.

- With Email API/SMTP toggled on, click Integrate under Transactional Stream or Bulk Stream.
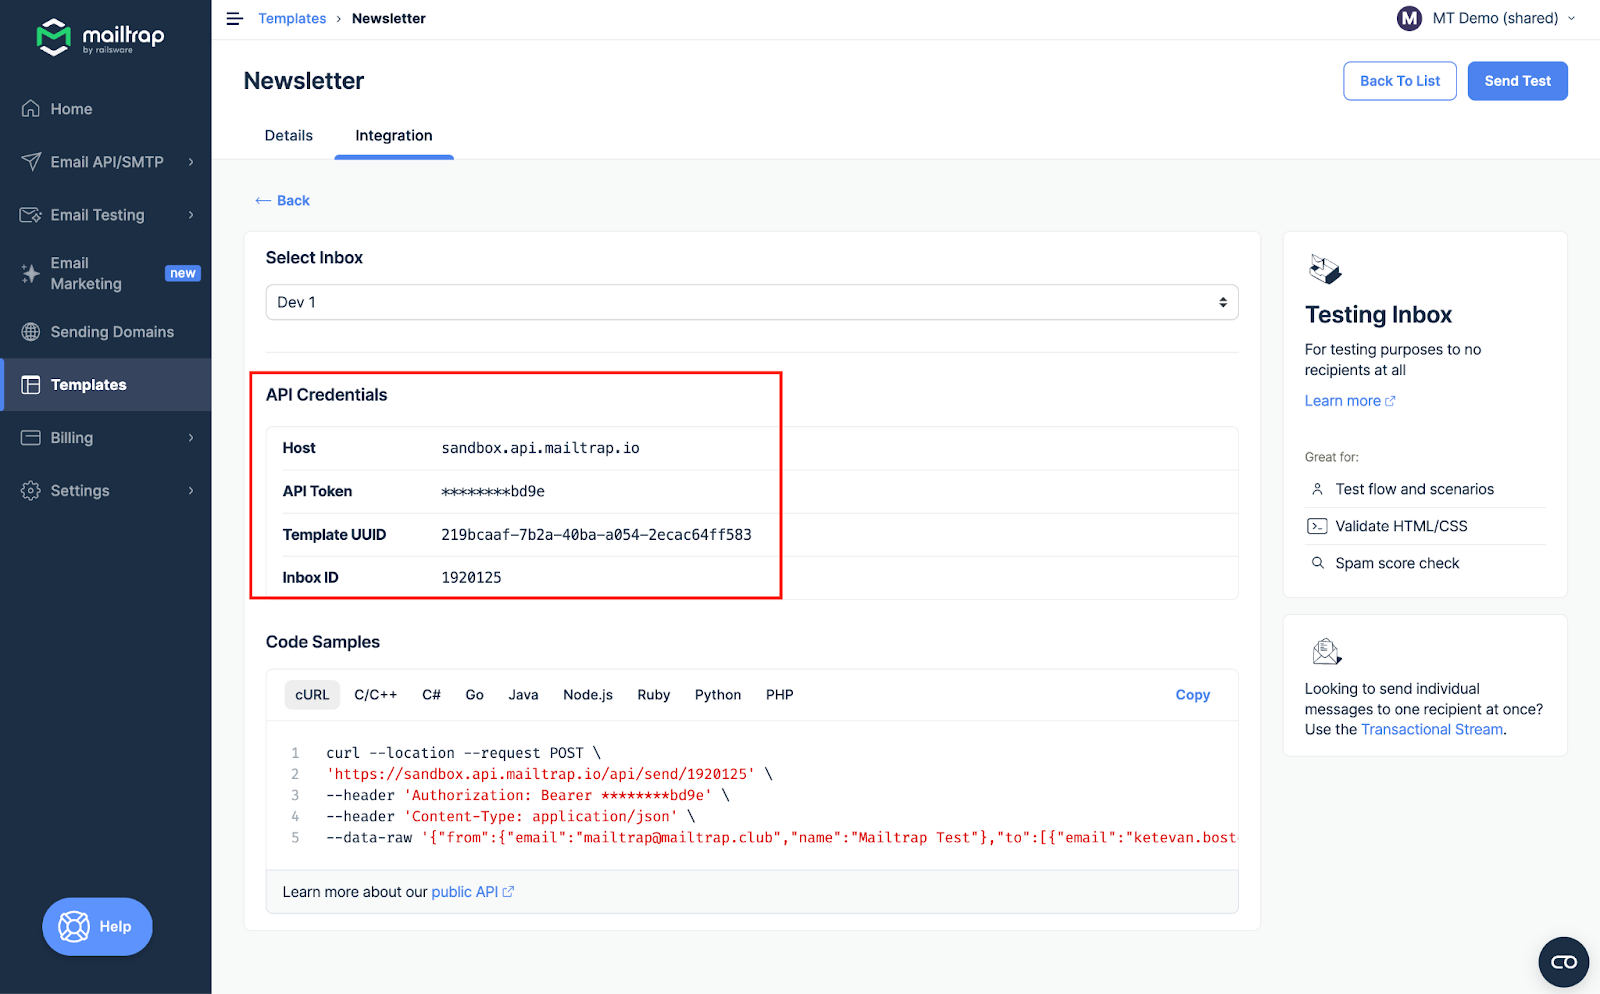
- Copy the necessary credentials such as Host, API Token, and Template UUID.
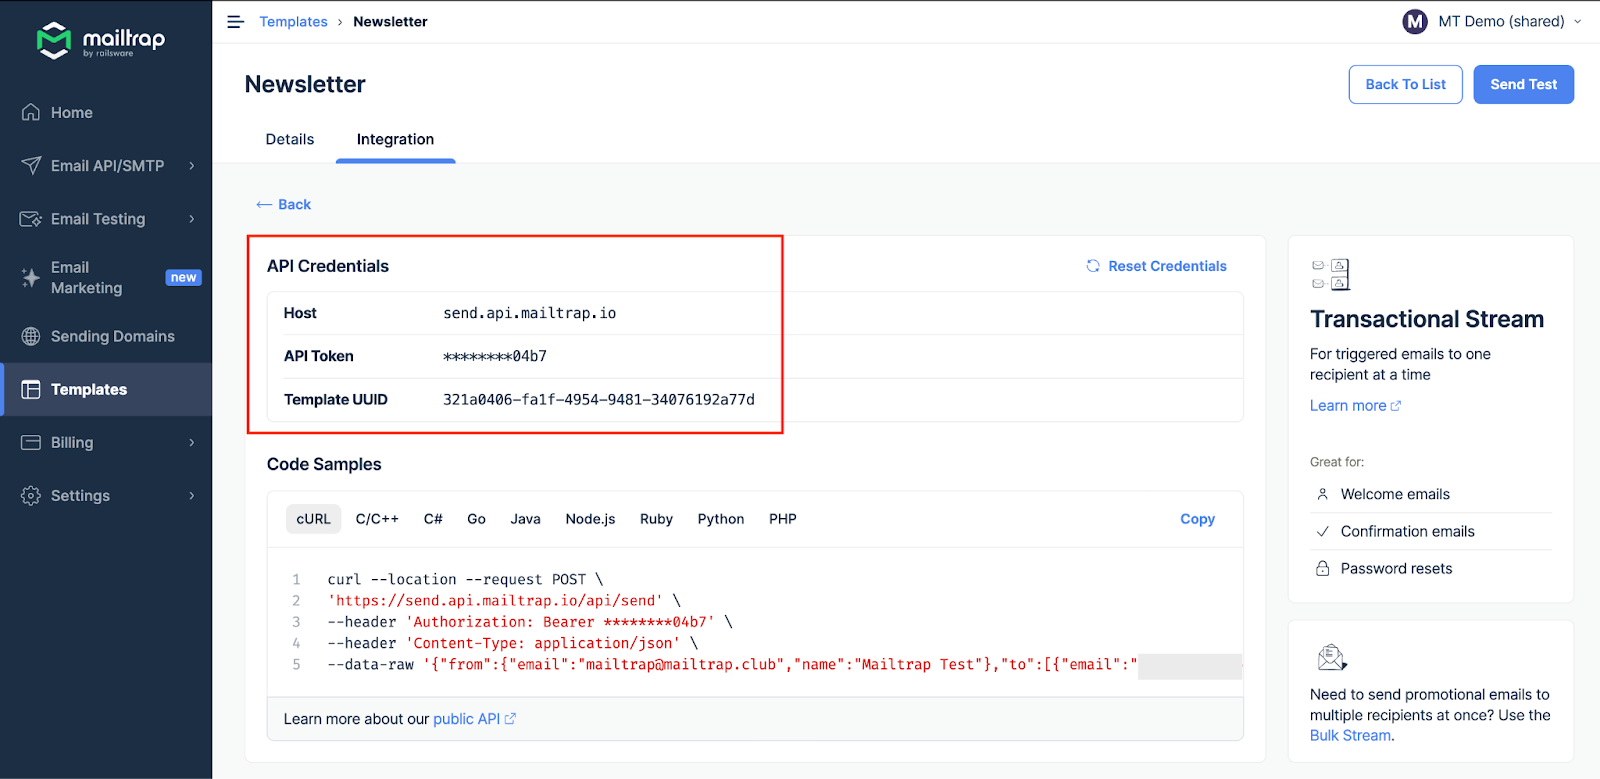
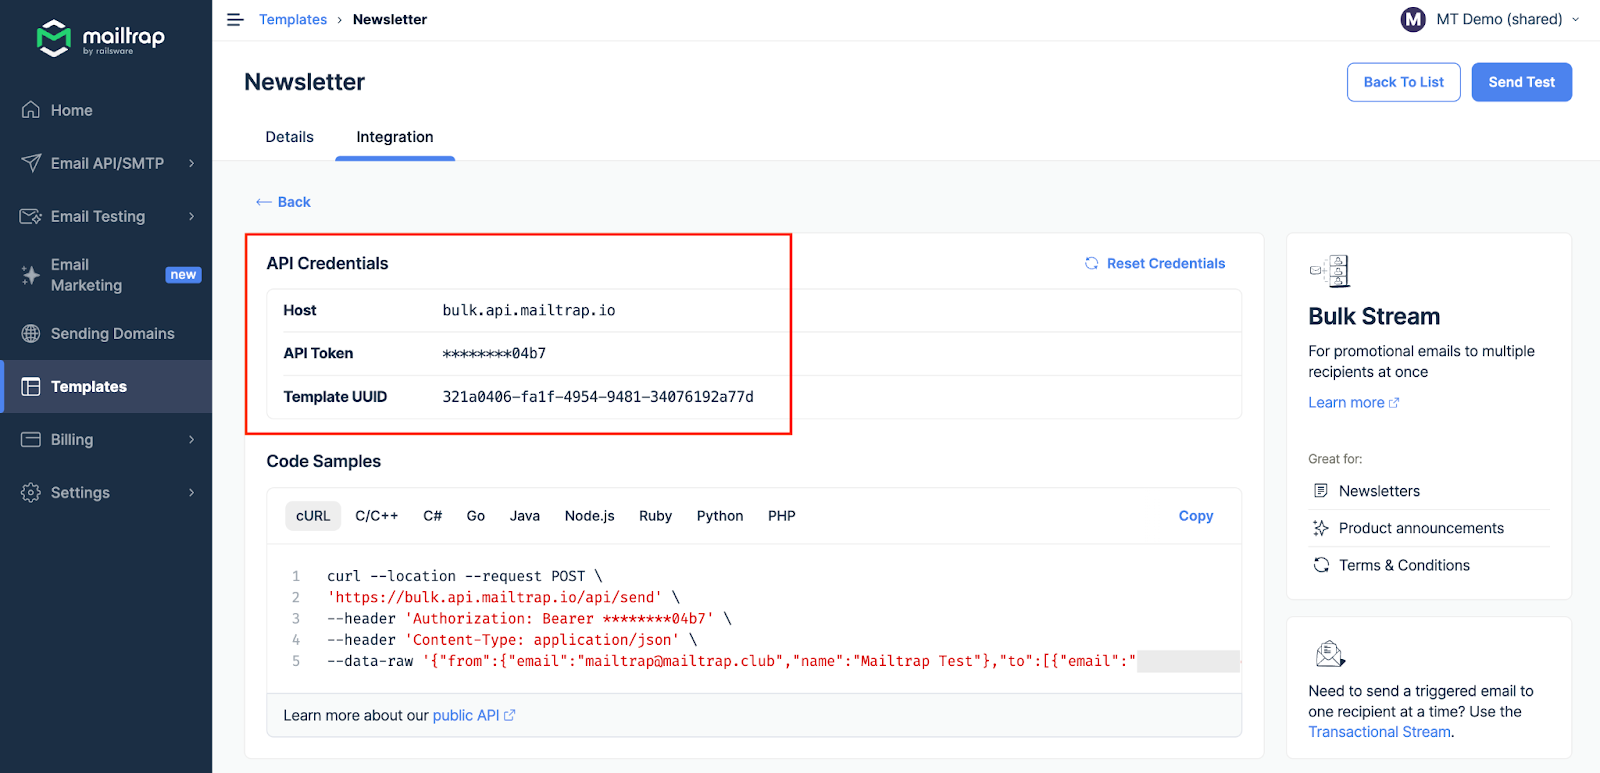
- Alternatively, under Code Samples, choose the desired language and copy the sample configuration already containing the necessary credentials. Mailtrap’s official SDKs (Node.js, Python, PHP, and Ruby) also support the templates feature.
- Paste the code into your project and customize it if needed. Then, run the code to send an email to the email address you indicated in your script.
For more details, open the API docs and go to Email Sending API → Emails → Send email (including template) for transactional stream and Bulk Sending API → Emails → Send email (including template) for bulk stream. Under Body, click the dropdown menu, and choose EmailFromTemplate .
Template debugging
- Navigate to Templates in the menu on the left.
- Click the template you want to call using the API.

- Open the Integration tab.
- Toggle the switch to Email Testing.

- And click Integrate.

- Select the desired sandbox from the dropdown menu to reveal its credentials. Copy the Host, API Token, Template UUID, and Sandbox ID.
- Alternatively, you can also use one of the pre-made Code Samples.
- Paste the code into your project and customize it if needed. Then, run the code to send an email to the selected Email Testing sandbox.
- Finally, check the sandbox you specified in the script.
- The Tech Info tab contains the link to the template you tested and lists all the variables used in the template.

For more details, open the API docs and go to Sandbox API → Test Emails → Send email (including templates). Under Body, click the dropdown menu, and choose EmailFromTemplate .
List of templates and user permissions
Clicking on Templates in the side menu lists all the templates you can access.
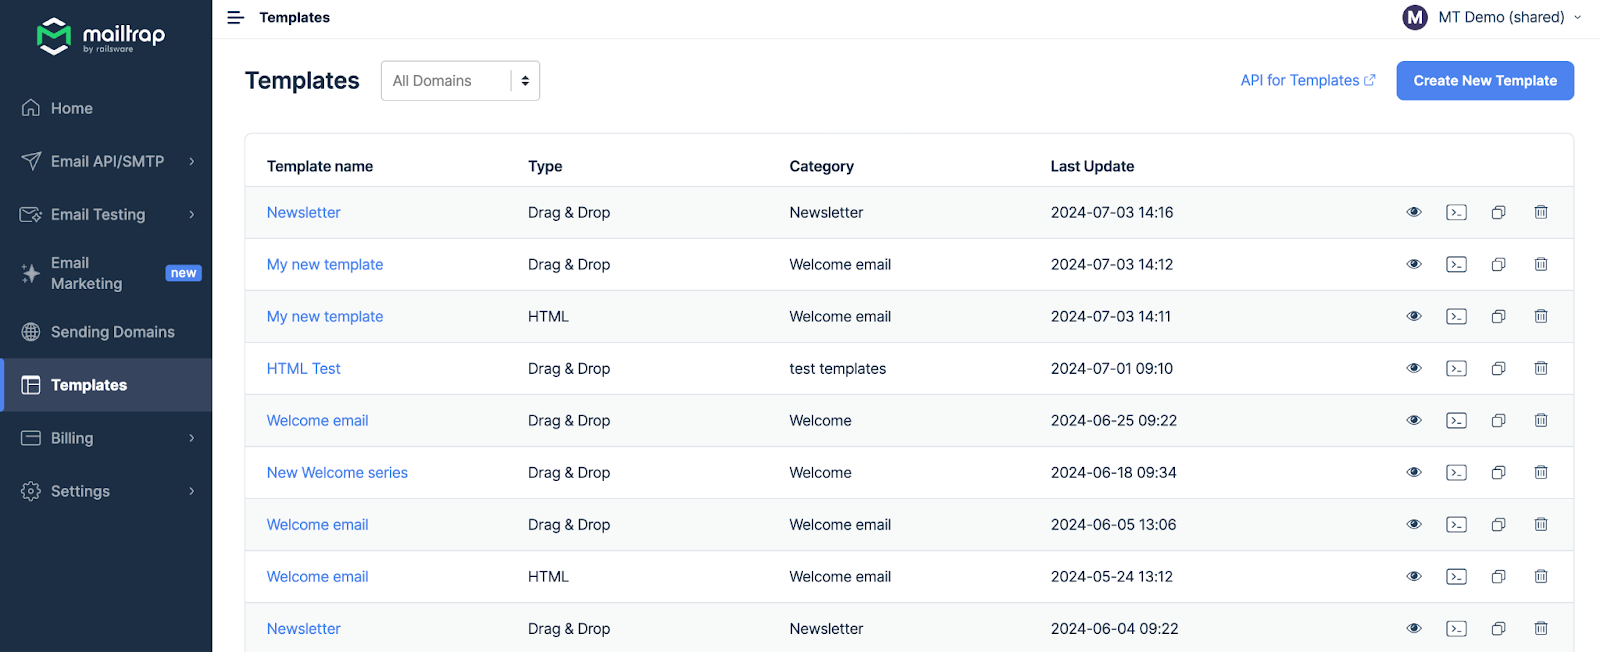
Access to templates is managed on a domain level. You need to have Admin access to a domain to manipulate the templates. In case you don’t have Edit rights, you can’t change the template.
Reminder: You can delete a template. However, this action is irreversible, so be sure to change the sending/testing code after deletion. When the template is deleted, the UUID is also deleted, and Mailtrap won’t be able to render it.
Each account can have up to 200 email templates. If you need more - please contact Support.