Setup SSO with JumpCloud
On JumpCloud side
1. Navigate to SSO
2. Click "+" button to add new application

3. Search for SAML and choose Custom SAML App
 4. Specify name and proceed to SSO tab

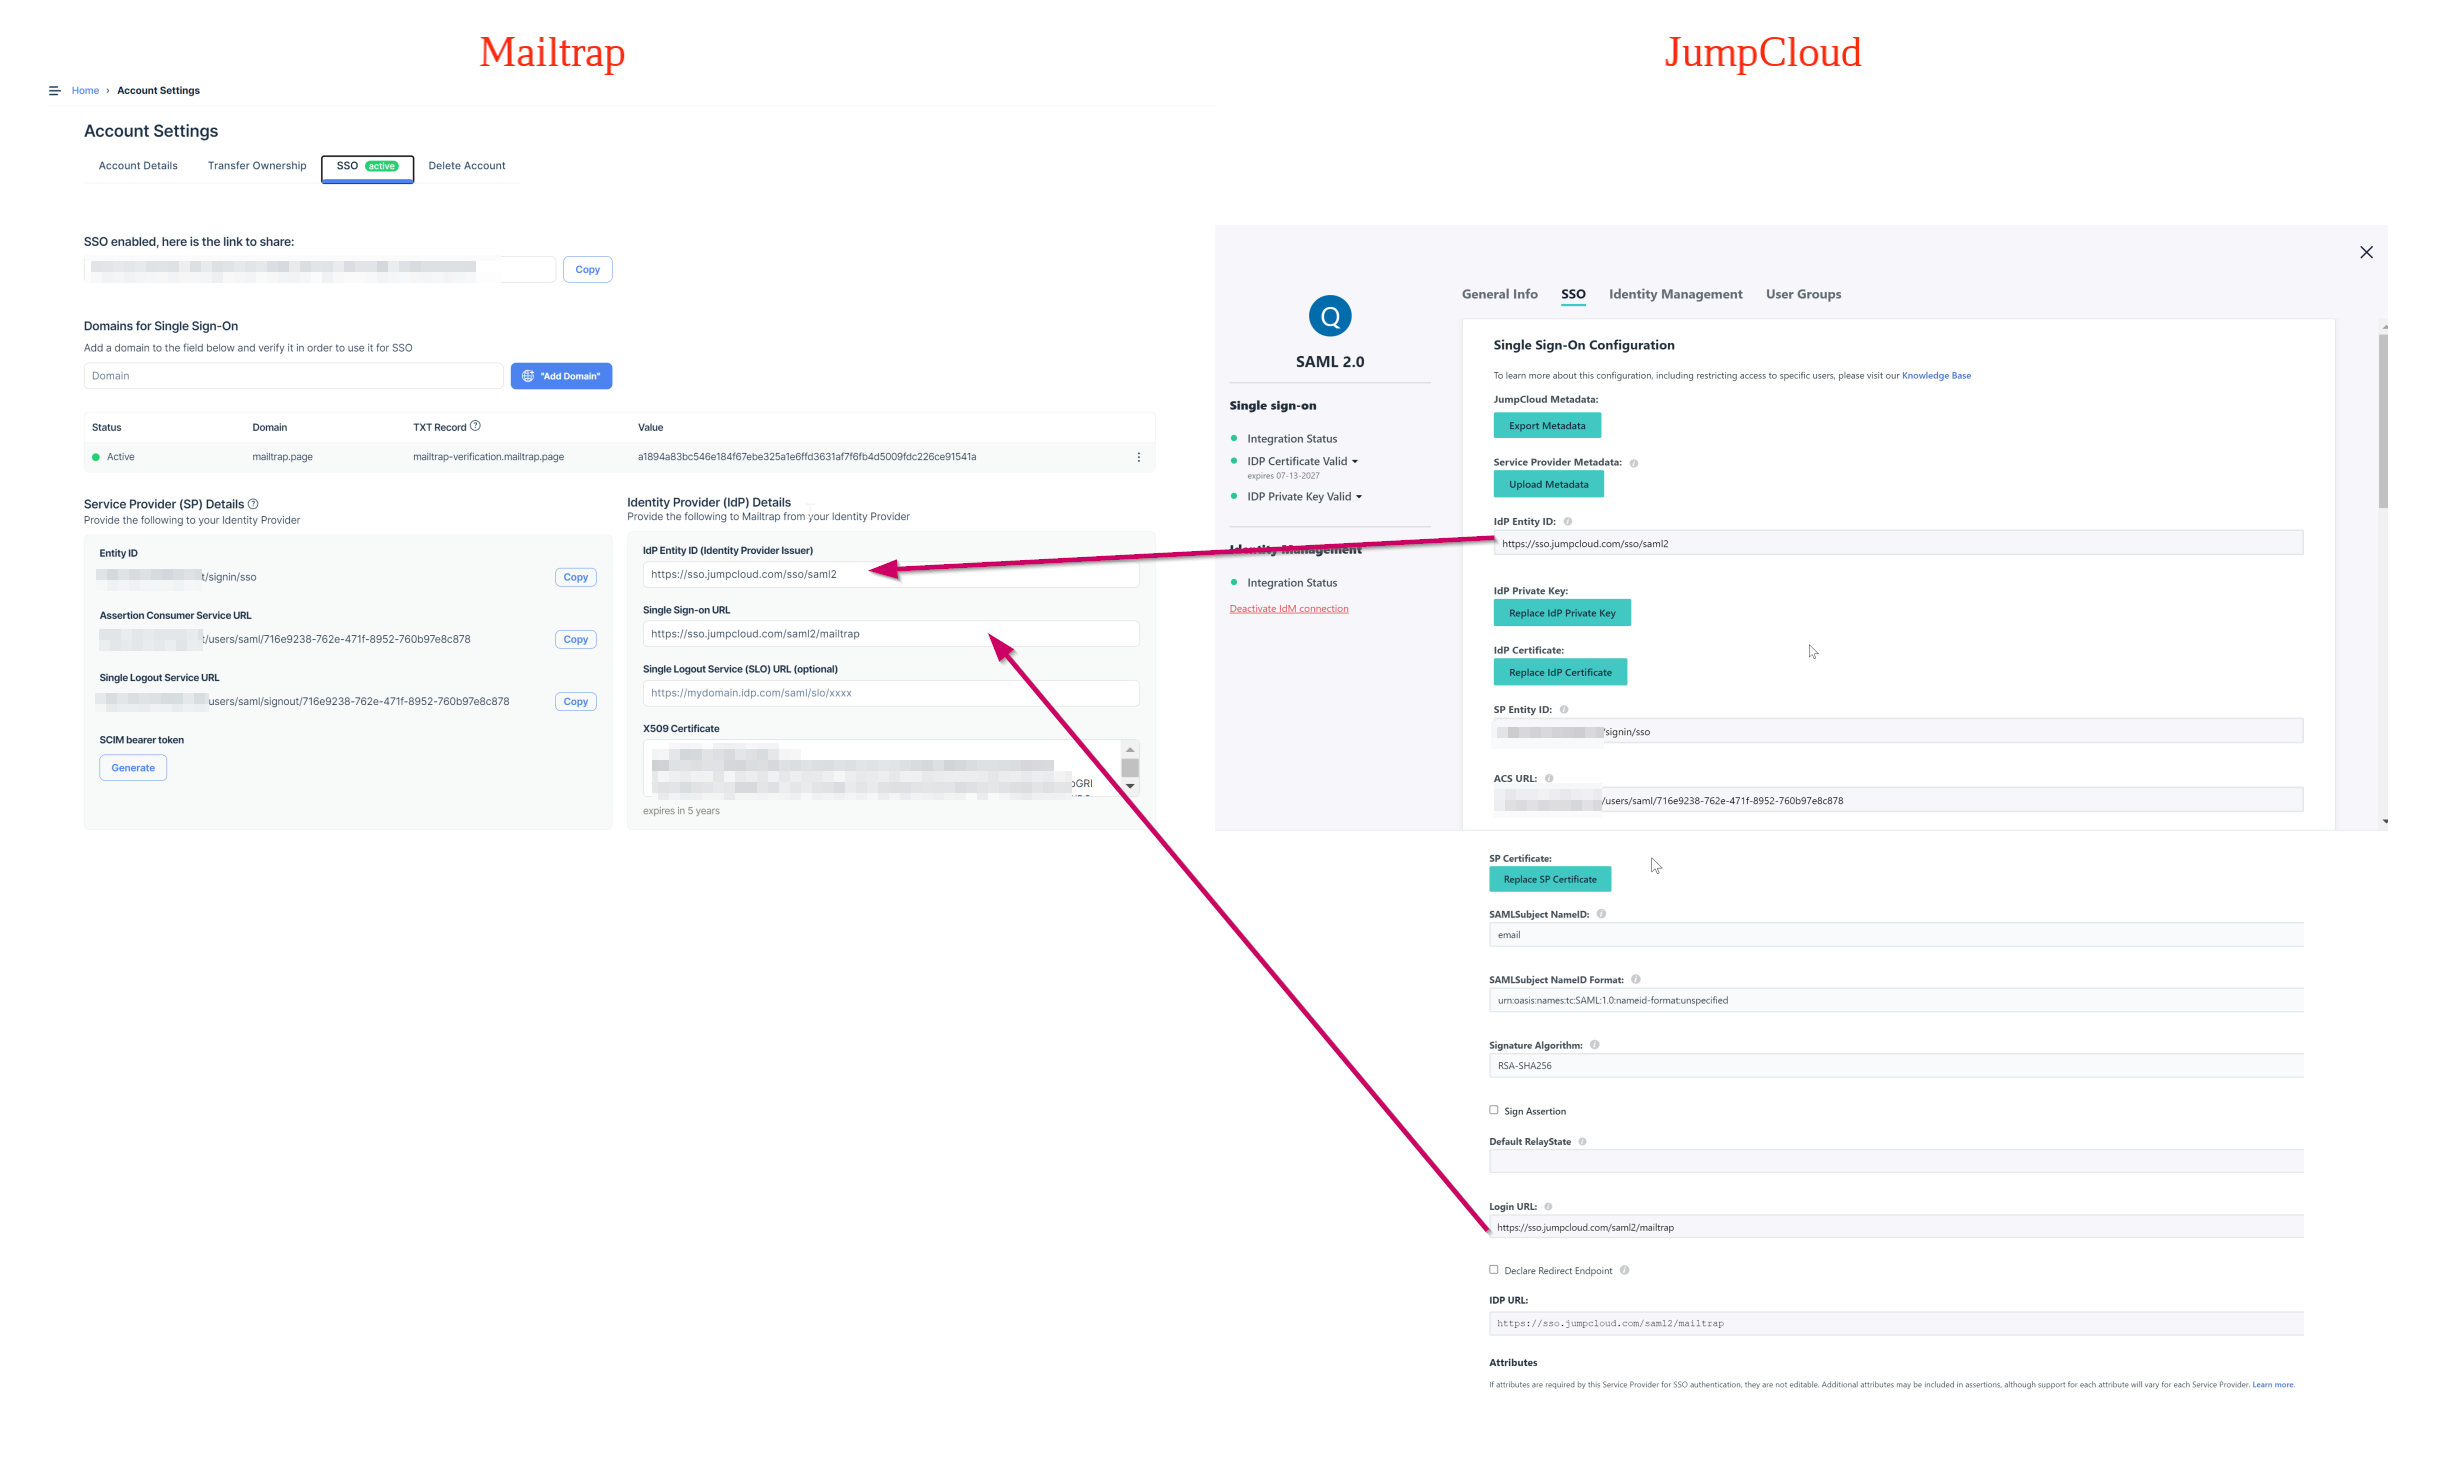
5. Provide the following SAML Provider details to JumpCloud from Mailtrap :
- SP Entity ID = Entity ID
- ACS URL = Assertion Consumer Service URL

- SAMLSubject NameID be `email`
- SAMLSubject NameID Format leave default value
- Signature Algorithm leave default value

6. Set IDP URL
7. Set IdP Entity ID8. (optional) Specify attributes for role mapping if required

9. Click Activate.
10. Click save in case of successful activation
12. Download the certificate

On Mailtrap side
After configuration is ready on JumpCloud side, next step would be to setup configuration on Mailtrap side.
2. Provide the following to Mailtrap from JumpCloud :
- IdP Entity ID (Identity Provider Issuer) = IdP Entity ID
- Single Sign-on URL = Login URL
- X509 Certificate = Value from downloaded certificate
3. Click Save in Mailtrap SSO configuration.
4. (optional) For Role mapping there is additional configuration, please find more details here in Step 4: Role mapping section
SAML configuration is complete.