Suppressions list
When certain events occur, Mailtrap adds the email address in question to a so-called suppression list. The events include - hard bounce, unsubscribe, and spam complaints.
The suppression list contains all the addresses you cannot send emails to - be it one of your domains or your account in general.
You’ll find all the addresses on suppression lists in the Suppressions menu to the left.

The menu contains the data for all your domains. If an email address was suppressed for more than one domain, it appears multiple times on the list.
You can export the whole Suppressions list (with data for all users) by clicking the Export in CSV button. You’ll then receive an email with an attached GZIP file containing the Suppressions list.
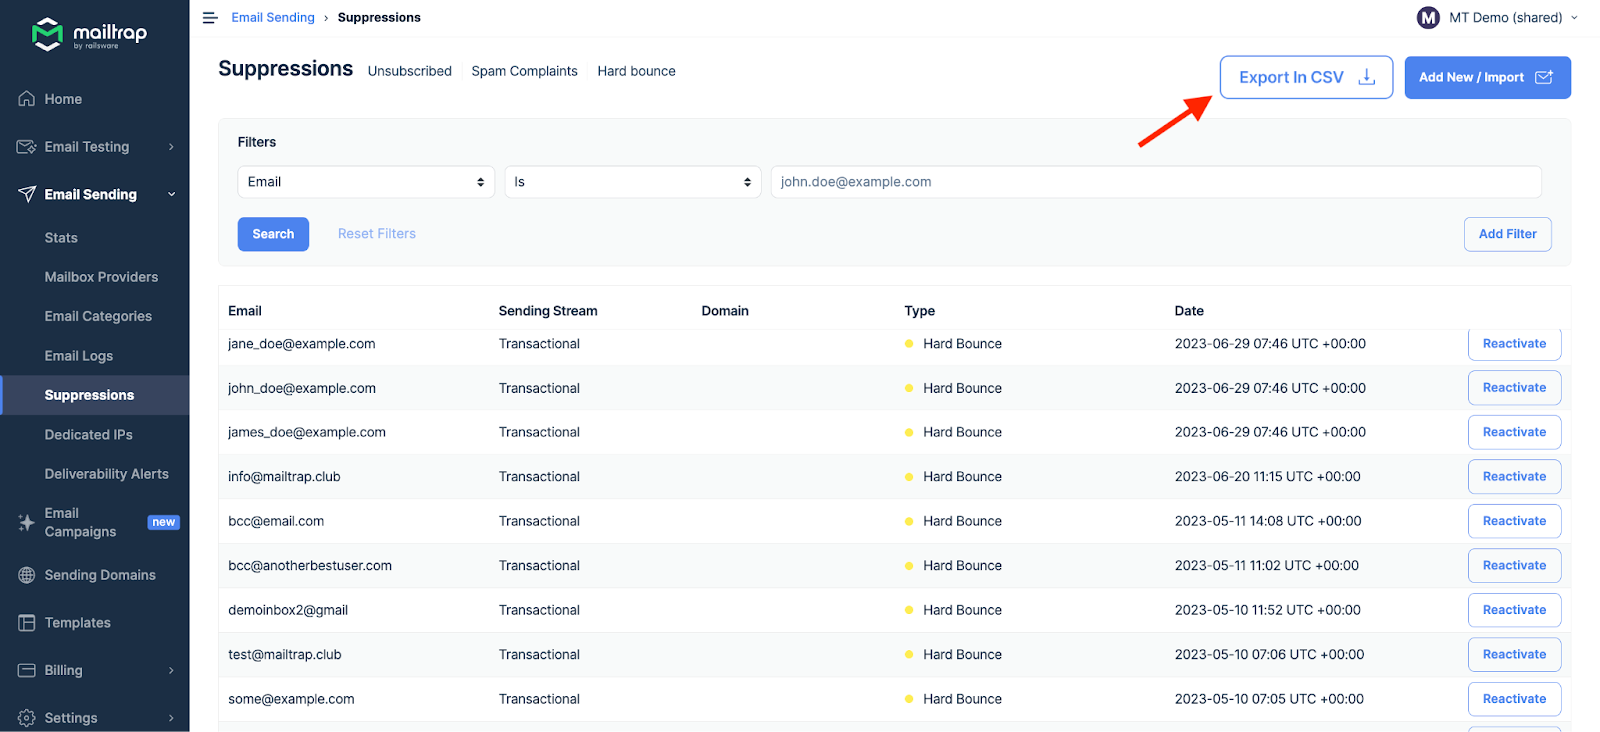
Note that Mailtrap verifies whether an email is present on a suppression list before sending the email. If an address is found, the email will automatically be rejected with the reject event and not delivered status.
Why do emails end up on a suppression list?
Emails end up on a suppression list if one of the following events occur:
- Bounce - there was a permanent delivery failure, most commonly because of an invalid address, or a server rejection. What’s more, emails that initially soft bounced (due to, for example, full inbox or server timeout) will also become a bounce if further delivery attempts aren’t successful.
- Unsubscribe - a recipient clicked on the unsubscribe button in your message.
- Spam Complaint - a recipient reported a message as spam (note: if an email automatically gets put into spam by a mailbox provider, the message still counts as delivered. So, it won’t land on a suppression list. Mailtrap can’t tell what happened to a message once it was accepted by a mailbox provider).
When an email bounces, it’s placed on a suppression list for all domains on your account (including any domains that will be added in the future). If a recipient unsubscribes or reports your message as spam, the suppression will only apply to a domain that a message was initially sent from.
Read more about events and statuses.
In some cases, the recipient’s mail server may reject your emails because of a message-specific issue. This can be because of a blocklisted sending IP address, blocked IP by ISPs (Internet Service Providers), or email content issues. Since these problems are related to a particular email and/or are temporary, the email address rejecting your message will not be added to a suppression list. You will be able to send emails to them once you address the issues or change email content.
Note: Google doesn’t share complaint data with sending providers. So, if a recipient hits the Spam button in Gmail to label your email as spam, this event doesn’t get registered and added to your suppression list.
How to remove an email from a suppression list?
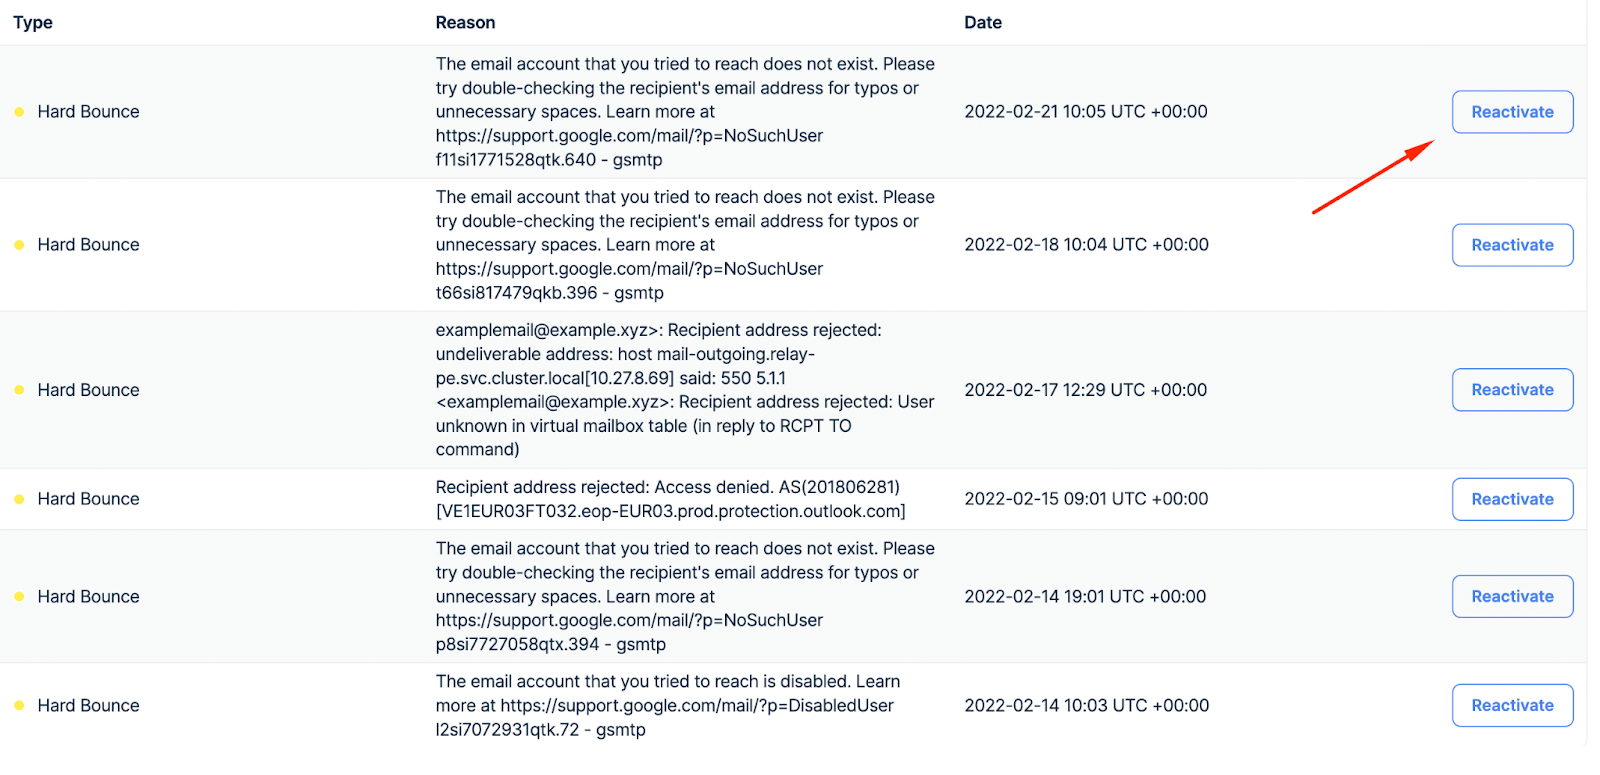
If you believe an email landed on a suppression list by accident, you can remove it by clicking the Reactivate button to the right. Once you’ve removed an email from a suppression list for this domain, you’ll be able to email them again as you normally do.
However, we advise you not to misuse the feature.
If someone decided to report your message as spam or leave your email list, you really don’t want to be emailing them again (unless they explicitly told you they had done it by mistake). Any further attempts will probably result in the same outcome, immediately hurting your email deliverability.
This is also the case for hard bounces - if an email didn’t exist, the chances are that it still doesn’t exist (unless you have information that suggests otherwise).
The same goes for other bounce events. For example, if a server policy states that certain types of emails are to be rejected, they will be rejected no matter what.
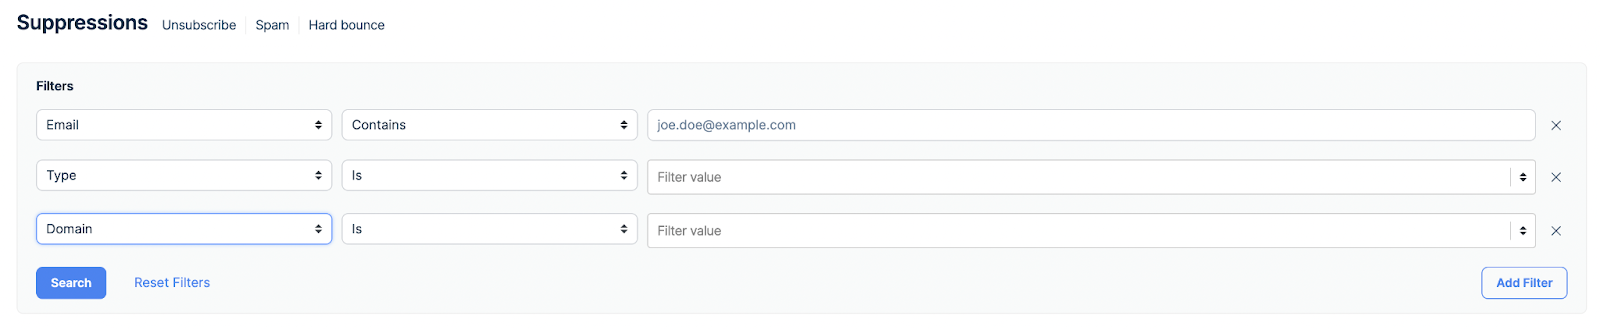
Suppression list filters
You can filter the suppression list for:
- Specific email address
- Sending domain
- Type of suppression
- Reason for suppression
For example:
Click any of the email addresses on the list to see more details, including the reason for landing on the list. For instance, if there’s a bounce, it pays to inspect the mailbox provider’s response that preceded the bounce.
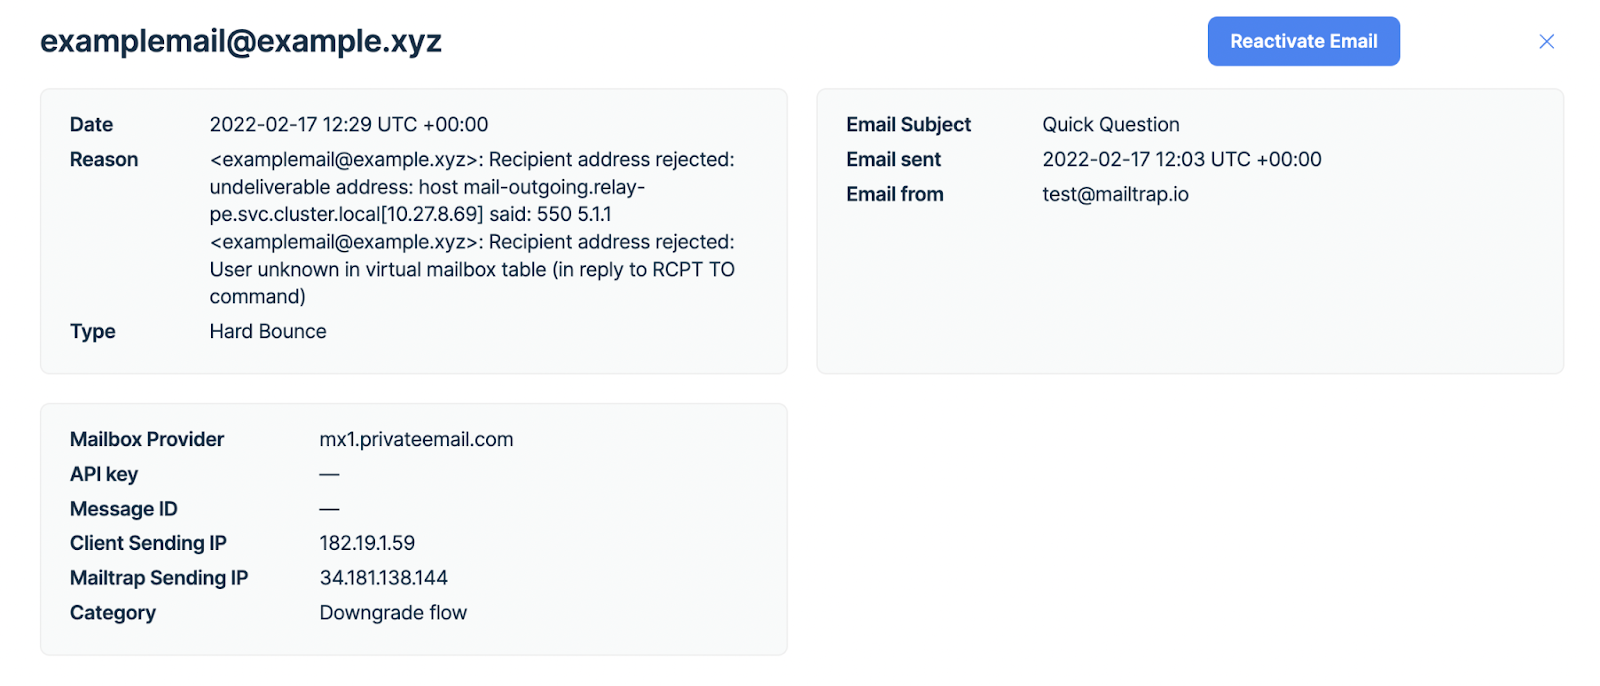
When it comes to spam or unsubscribes, Mailtrap doesn’t display the reason because it’s pretty self-explanatory.
How to add recipients to the suppression list?
Mailtrap allows you to add recipients manually or upload CSV, here’s how to do it.
Manual method
Select “Insert manually” under Add recipients to suppression list, and click on the drop-down menu to choose all or one of your domains.

After domain selection, type or copy-paste the email addresses you want to suppress into the designated box. Complete the action by clicking the Add To Suppression button.

You can add only one email address per line and up to 1000 emails per selected domain.
Note that there’s also the Add New/Import button at the top right of the screen in the Suppressions main dashboard. It allows you to quickly access the Add recipients to suppression list menu.

Upload CSV
Before you upload CSV to Mailtrap, you first need to export the document from your current sending provider. See how to do it with SendGrid, Postmark, and Mailgun.
Exporting Suppressions
Sendgrid
Navigate to Suppression Management - this is where you’ll find the list of all your Unsubscribe Groups. You’ll see the default groups and the ones you created.
To export the CSV file, you’ll need to click the Settings button (the gear icon) next to each group, then choose Export.
Mailgun
Mailgun keeps three suppression lists (complaints, bounces, and unsubscribes) for each of your sending domains. There’s no global, account-level suppression list, so you’d need to export separate lists for each domain you transfer to Mailtrap.
To get the list in CSV format, make sure you choose the correct domain and use the Mailgun dashboard to export the lists.
Postmark
There’s an Export button in the Postmark dashboard. This allows you to export up to 500 records in a JSON file. For more records, you’d need to use Postmark’s Messages API.
To convert JSON to CSV you can use many of the services available online. More information can be found at Postmark’s help page.
Importing to Mailtrap
Select Upload CSV under Add recipients to suppression list and click the drop-down menu to choose one of your domains.

Click Browse file to select the CSV file from your computer, or you can just drag and drop it into the Select file box.
To complete the action click Add To Suppressions and you’re done. If you wish, you can also download our CSV template by clicking on the corresponding option.